Even though the Dwarf III stacks internally as each single exposure is aquired giving you a "live" stacked image on your mobile or tablet screen which is perfectly suitable for most people, you also have the option to take these individual subs and stack them in your favourite stacking software for further processing.
DeepSkyStacker is a free bit of software that will take your individual images (subs) and callibration frames (dark, flat, bias) and stacks them to give you an image that you can then use to process further in something like Affinity Photo 2 PhotoShop, GIMP or any other image processing software. Its easy to use, fast and free!!!
It is used by thousands of astrophotographers worldwide and is seen as one of the staples in the astrophotography process.
For this tutorial I have used the subs taken via my Dwarf III to show how easy and quick DeepSkyStacker is to use. This will be exctly the same process for other smart telescopes like the Dwarf III or any other telescope setup, be it smart or traditional.
Stacking
Firstly, you need to remove the individual subs (otherwise called light frames or lights) from the device or camera you have used to capture your target.
Smart telescopes are usually connected to your computer via WiFi or a cable. DSLR subs are also transfered via a cable or by inserting the SD card into the computer. If you have multiple sessions on a target, ensure that these sessions (along with each sessions callibration frames) are in seperate folders.
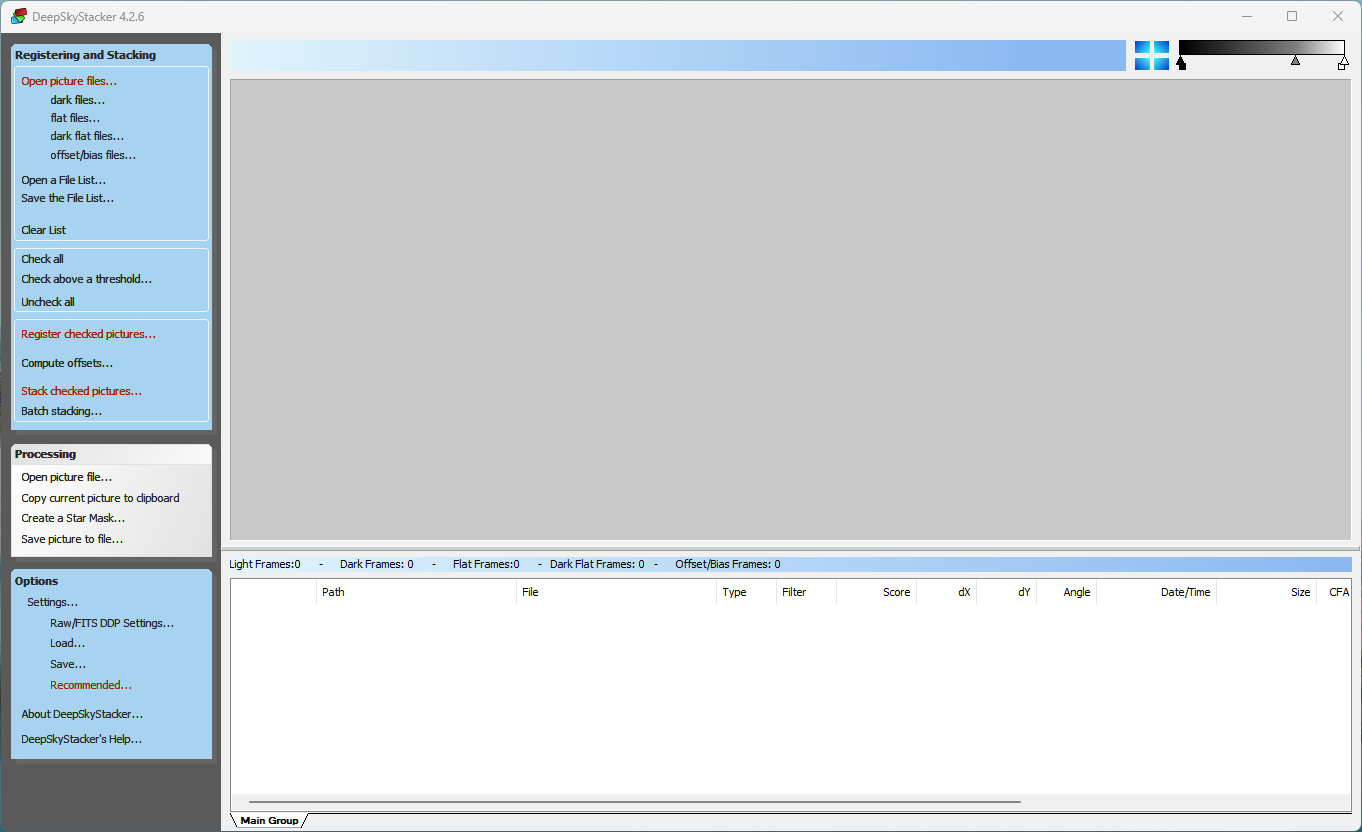
1) On opening DeepSkyStacker you are presented with the main screen seen above. Everything you ned to achieve a stack is listed in the left hand box and is in descending order (pretty much).
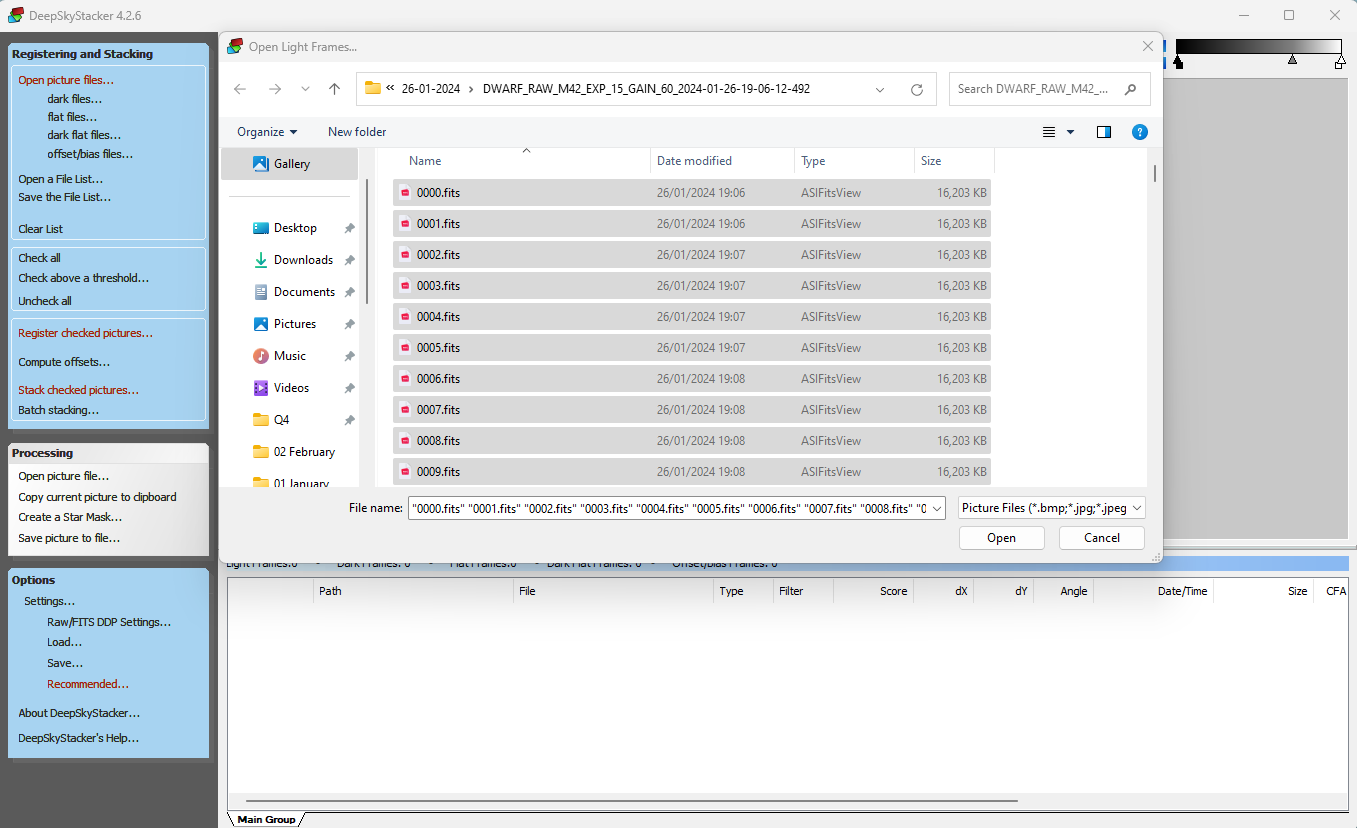
2) Click "Open Picture Files", this will open the file selection box. Just navigate to the folder with your light frames and select the lights that need to be stacked and click "Open"
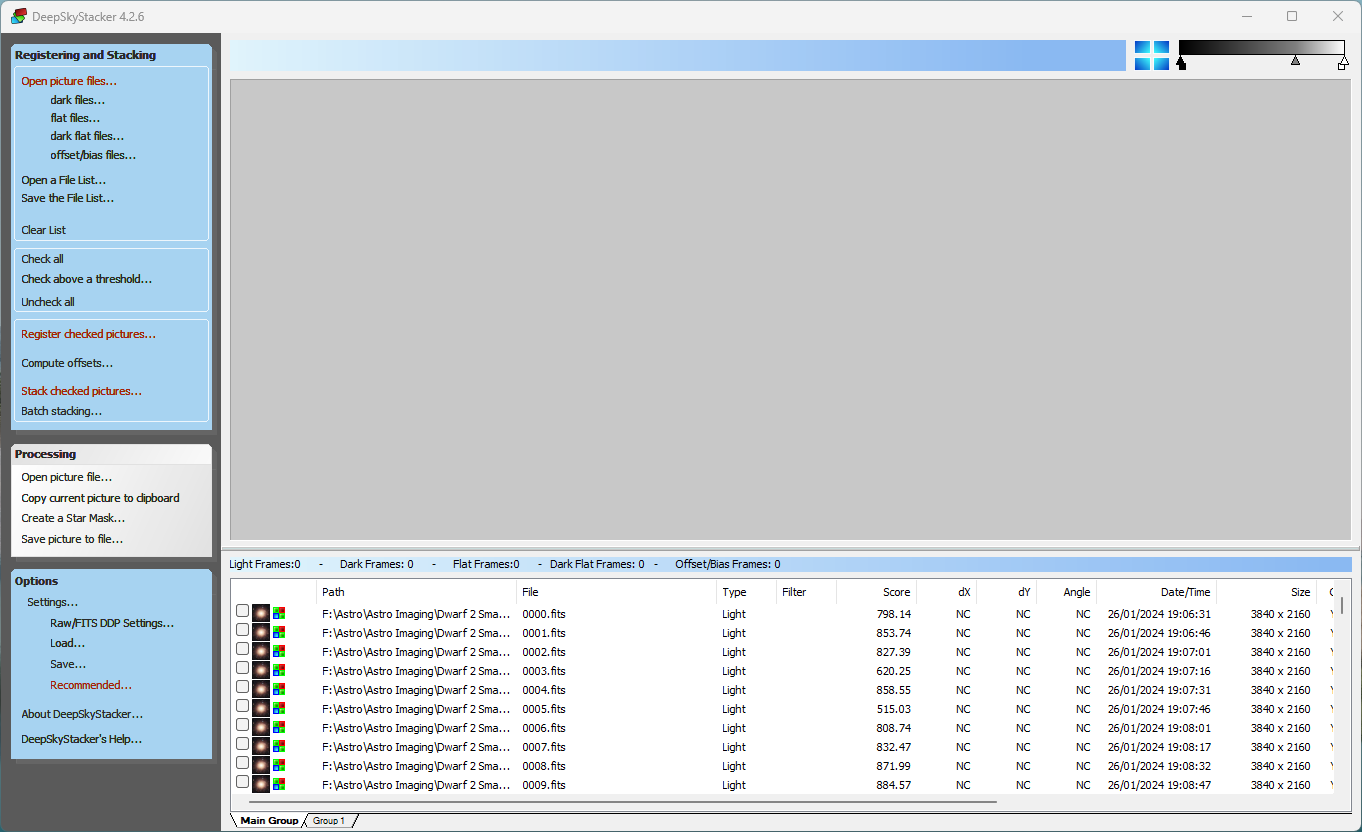
3) As you will see, the images have been loaded into the box at the bottom of the screen. Now, if you have taken calibration frames you will add them at this point. If not, just move on to the next section. Select "Dark Files" and add your dark frames if you have them. Repeat this process with any further calibration frames you may have taken.
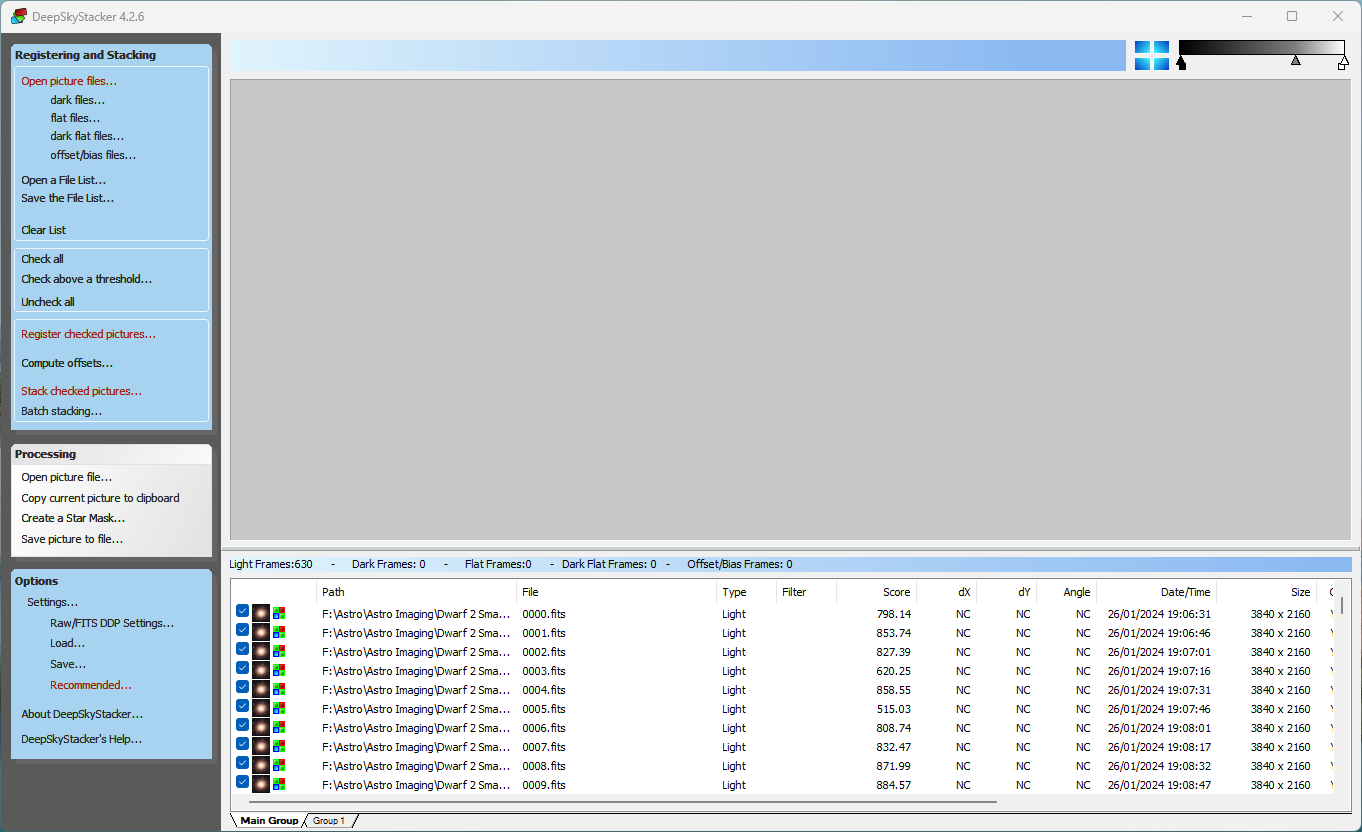
4) You now need to make sure that you click on "Check All". This will then select all images to be stacked. If you wish, you can scroll through each image and deselect any that may have trailing or are not worthy of being in the stack. To do this, just click the tick away and that image will not be used in the stack.
5) Now click on "Register Checked Pictures". This will bring up a little settings box. Click on the "Advanced" tab. This is where you can get the software to detect more stars if needs be. Just move the slider left to right and click the "Compute The Number of Stars Detected" button. Just be mindful that the more stars detected, the longer the registration and stacking processes will take. As long as the software can detect 20 or more stars then it will stack. Between 50 and 200 is a good amount of star detection.
6) Now click the "Actions" tab and make sure that "Automatic Detection of Hot Pixels" is selected. Then click "OK" to start the registering phase.
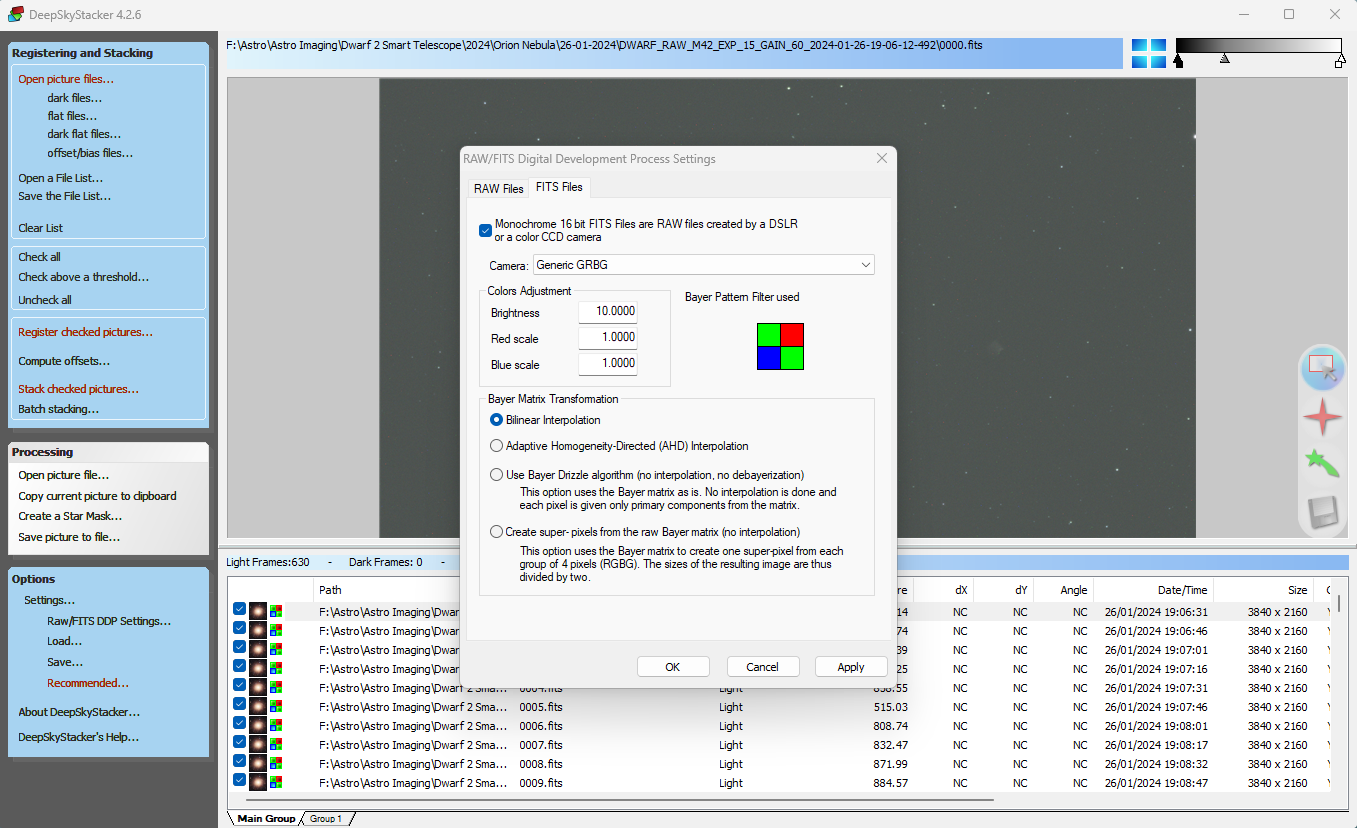
7) If you have issues with very low star detection then just click on "RAW/FITS DDP Settings" and in the "FITS Files" tab up the brightness level by 1 at a time until the register part can detect enough stars in your image. Remeber to click apply between each increment rise.
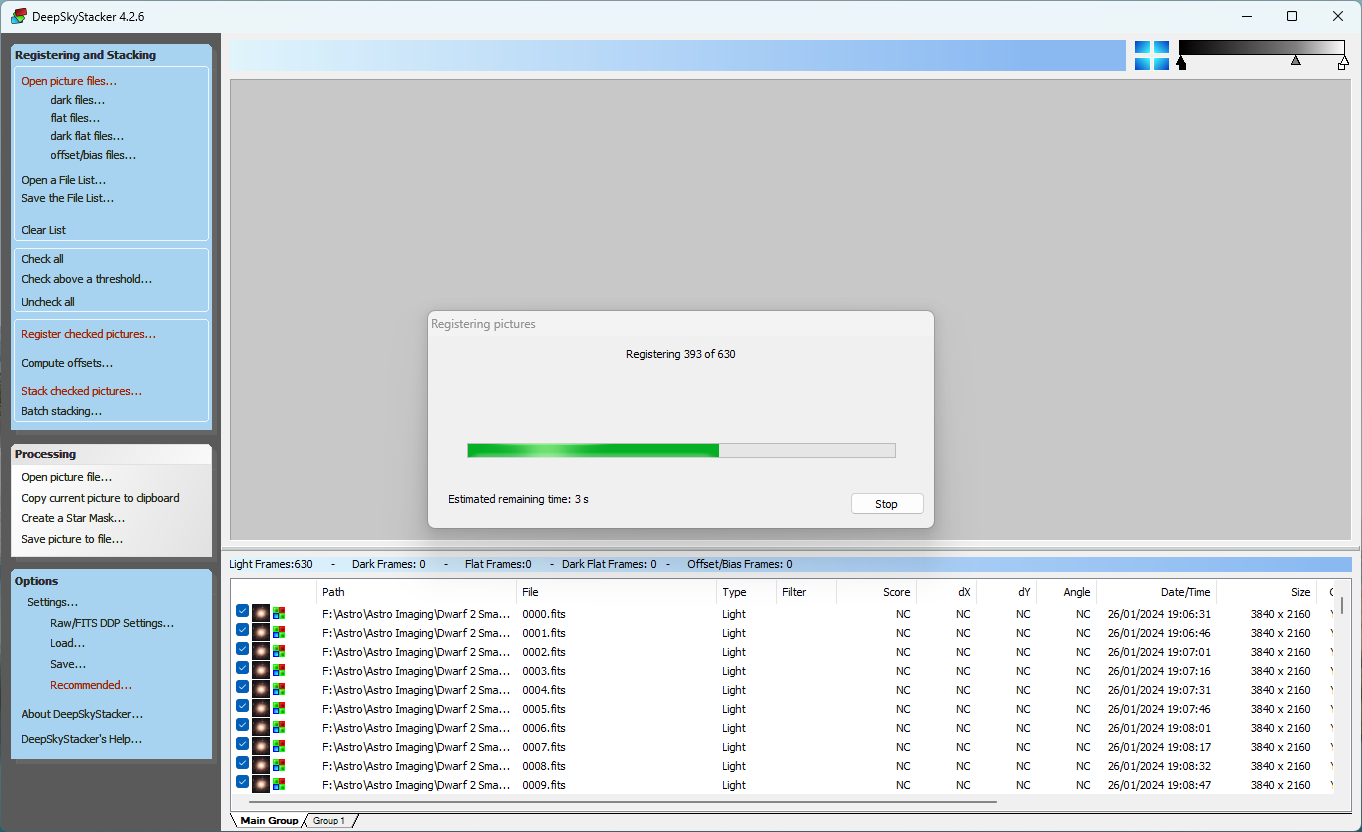
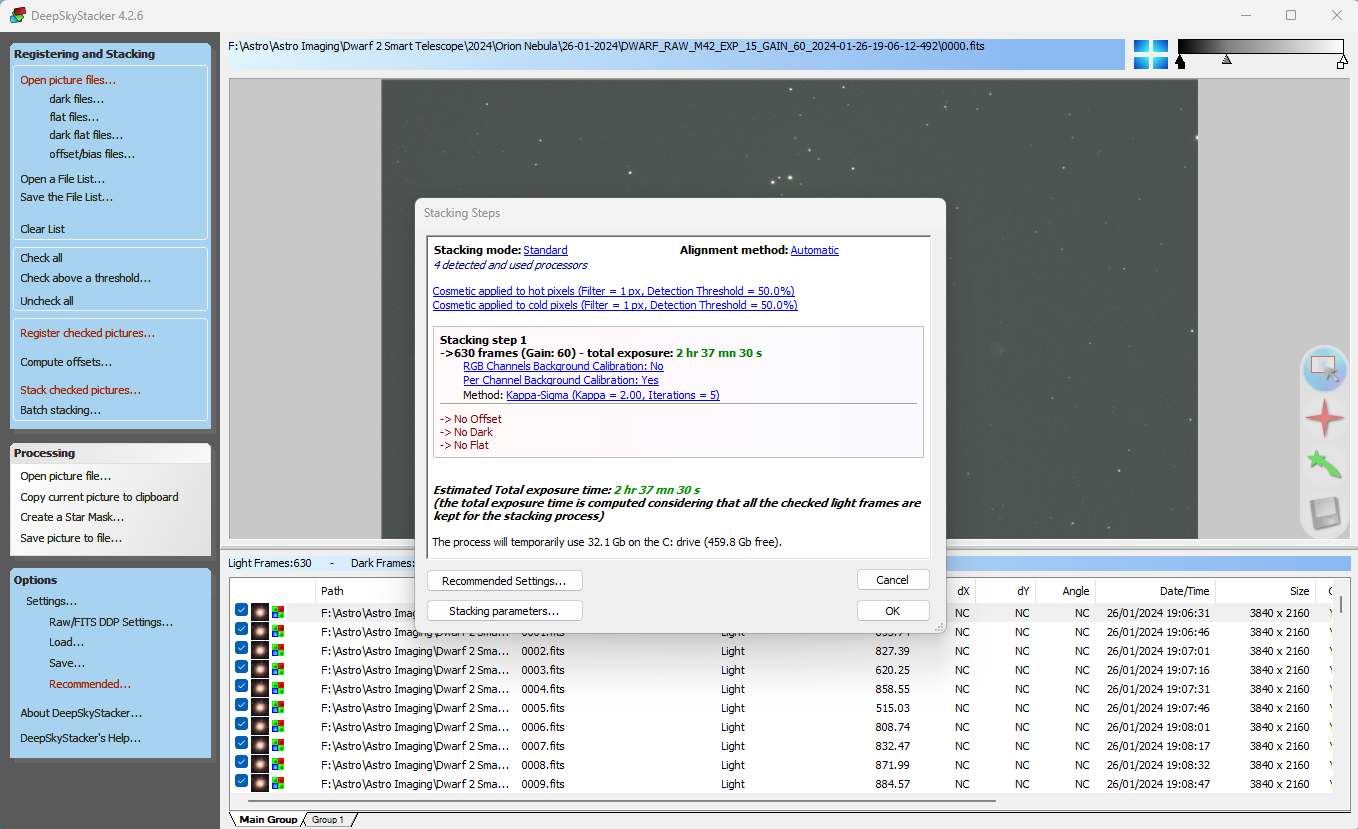
8) You can now go ahead and stack. Do this by clicking on "Stack Checked Pictures" in the left hand panel. The following box will appear. Just check the details are fine and then click "OK" to start the stacking process.
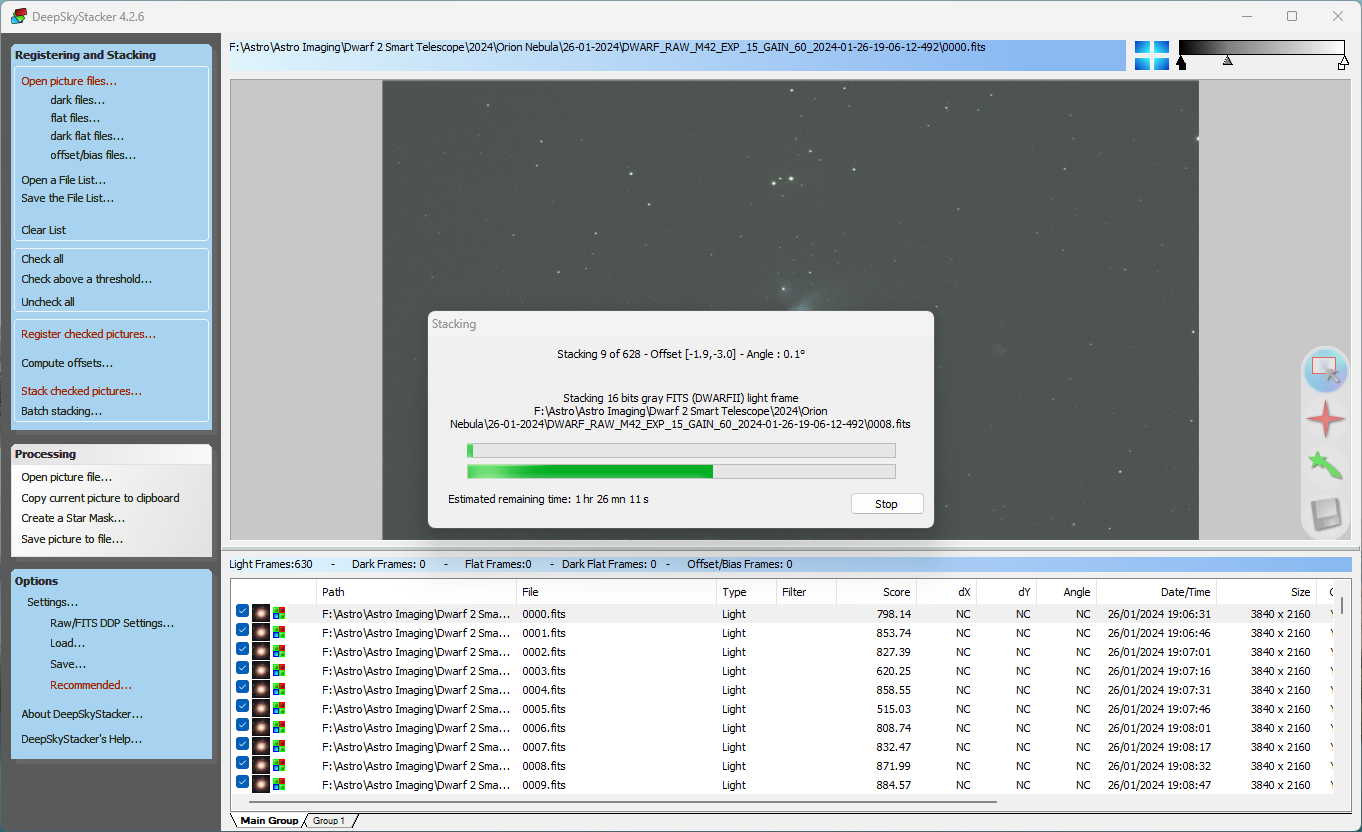
9) DeepSkyStacker will now stack your selected lights (and calibration frames if used).
10) Once completed, the stacked image will be displayed on the screen. The software will automatically save the file to the same folder as your light files and you will see this named "Autosave". This can then be opened for further editing in your chosen image processing software.