I am looking for Language translators. If you can translate this page and any of the tutorial pages, and you are happy to volunteer your time to do it then I will be very grateful.
Online translators are not reliable and I would like to get the translations right.
Please contact me via email if you can help - paul@smartastro.co.uk
Once connected to the telescope and you have clicked the "Photo" Button on the main page you will be presented with the "Photo" mode. It looks like there is quite a bit going on, but it's fairly simple.
The first thing you need to do it to point your Dwarf III unit in the general direction of the required target. You can find out where your intended target is by using the Atlas feature in the app or by using any other planetarium app.
Ensure that the two lines on the back of the unit are aligned and open the lens tube buy twisting it with either your hand or by using the in-app, on-screen directional button. Its best to turn it to a nice clear part of the sky without any obstructions.
Here is a quick 7 step guide to get you imaging. I will go further in to the process below with pictures.
This tutorial deals with the non EQ mode setup (no Polar alignment). For the Polar aligning tutorial please click here (Coming soon).
1) Face the unit in the general direction of your target and rotate (manually or with the direction buttons) the lens up so it is facing a clear portion of the sky.
2) Ensure that the unit is in focus. Do this by using the "focus" panel in any mode and press the "Auto" focus button.
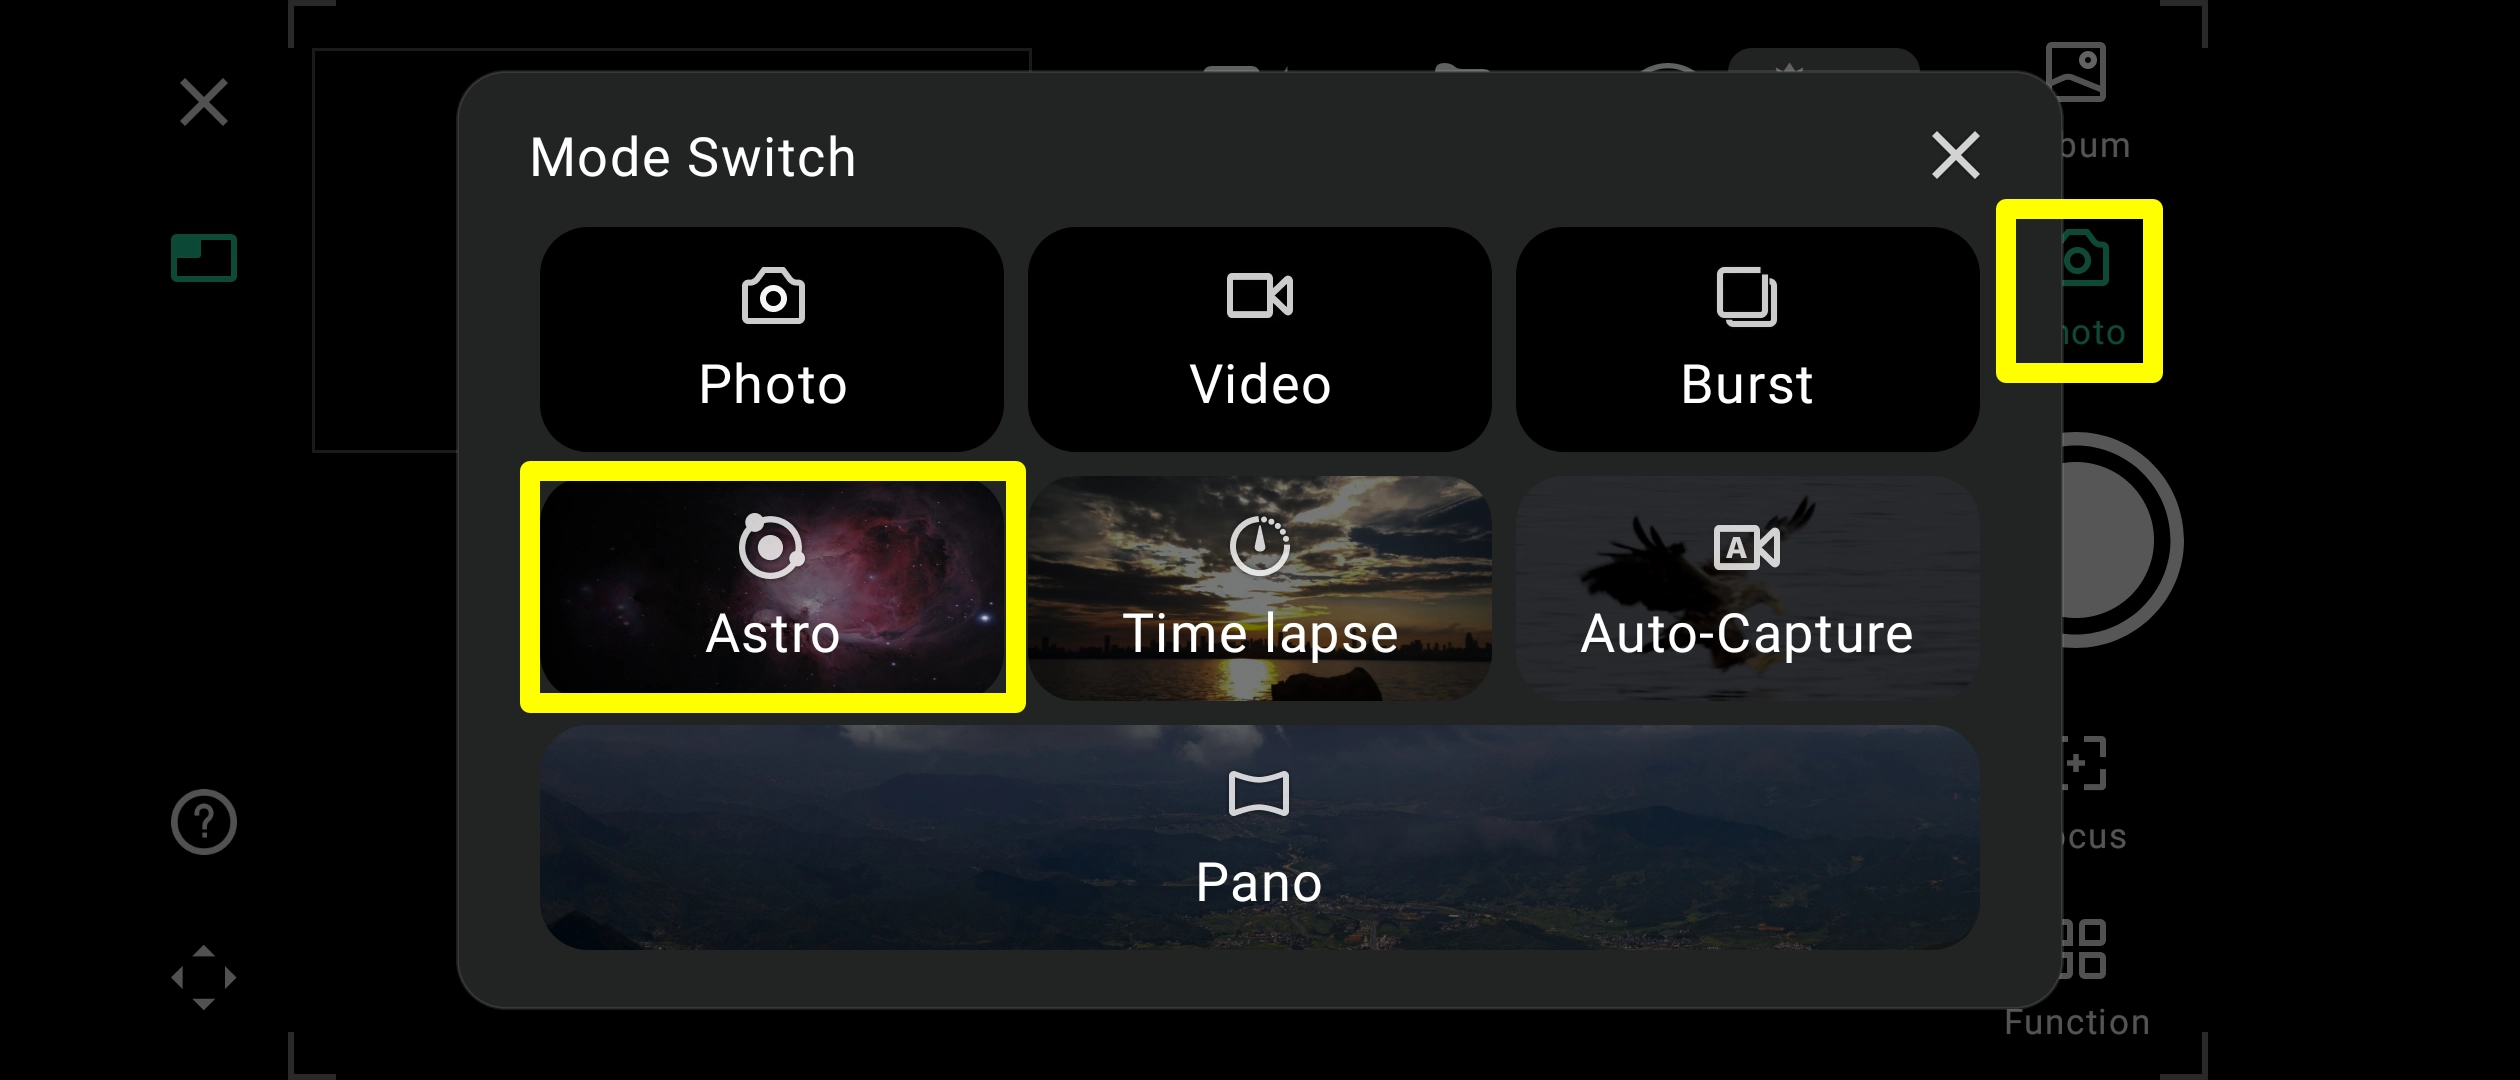
3) Click "Photo" in the right hand panel, then select "Astro" in the box that appears.
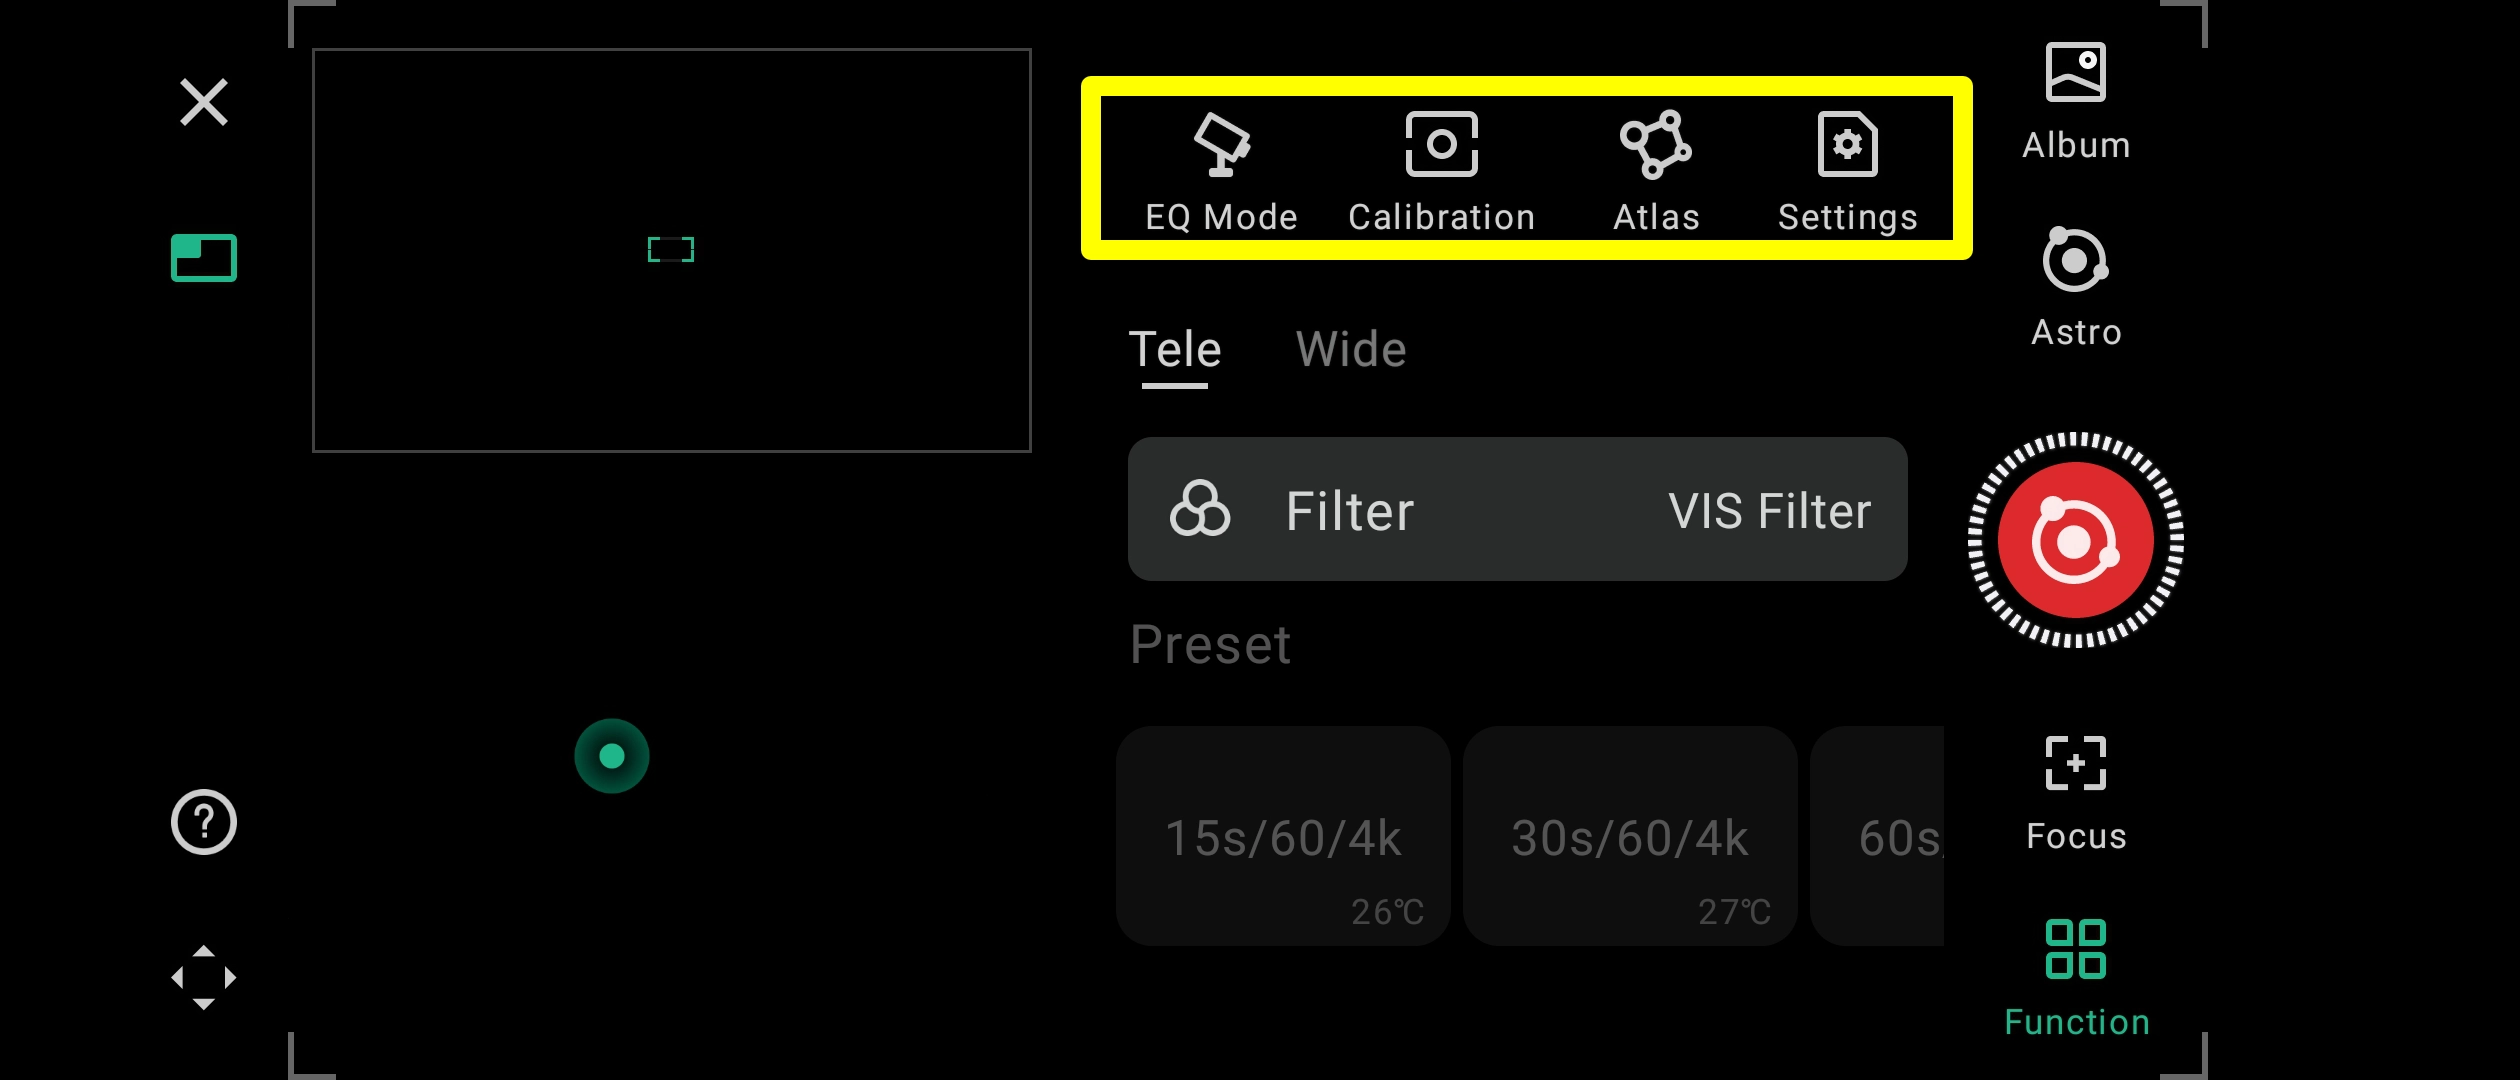
4) Click on "Function" then "Calibration" and wait for it to complete the calibration process.
5) Click "Atlas" and search for your required target in the list or on the sky map. Click "Confirm". The Dwarf III will now find the target and centre it using plate solving.
6) Click "Parameters". The first option here is the filter selection. Select the required filter then scroll down to the exposure setting and move the slider to select how many exposures you want to take.
Do the same for both the gain and amount of exposure sliders as required.
7) You are now ready to image. Just click the big red button on the right and hey presto, you're imaging.
If you wish to end the session before the count is completed then once again click on the big red button on the right. Then click on "End Current Session" to end the session or search for another target by repeating the steps above starting at #5.
The following now goes in to a bit more detail of the above steps with pictures.
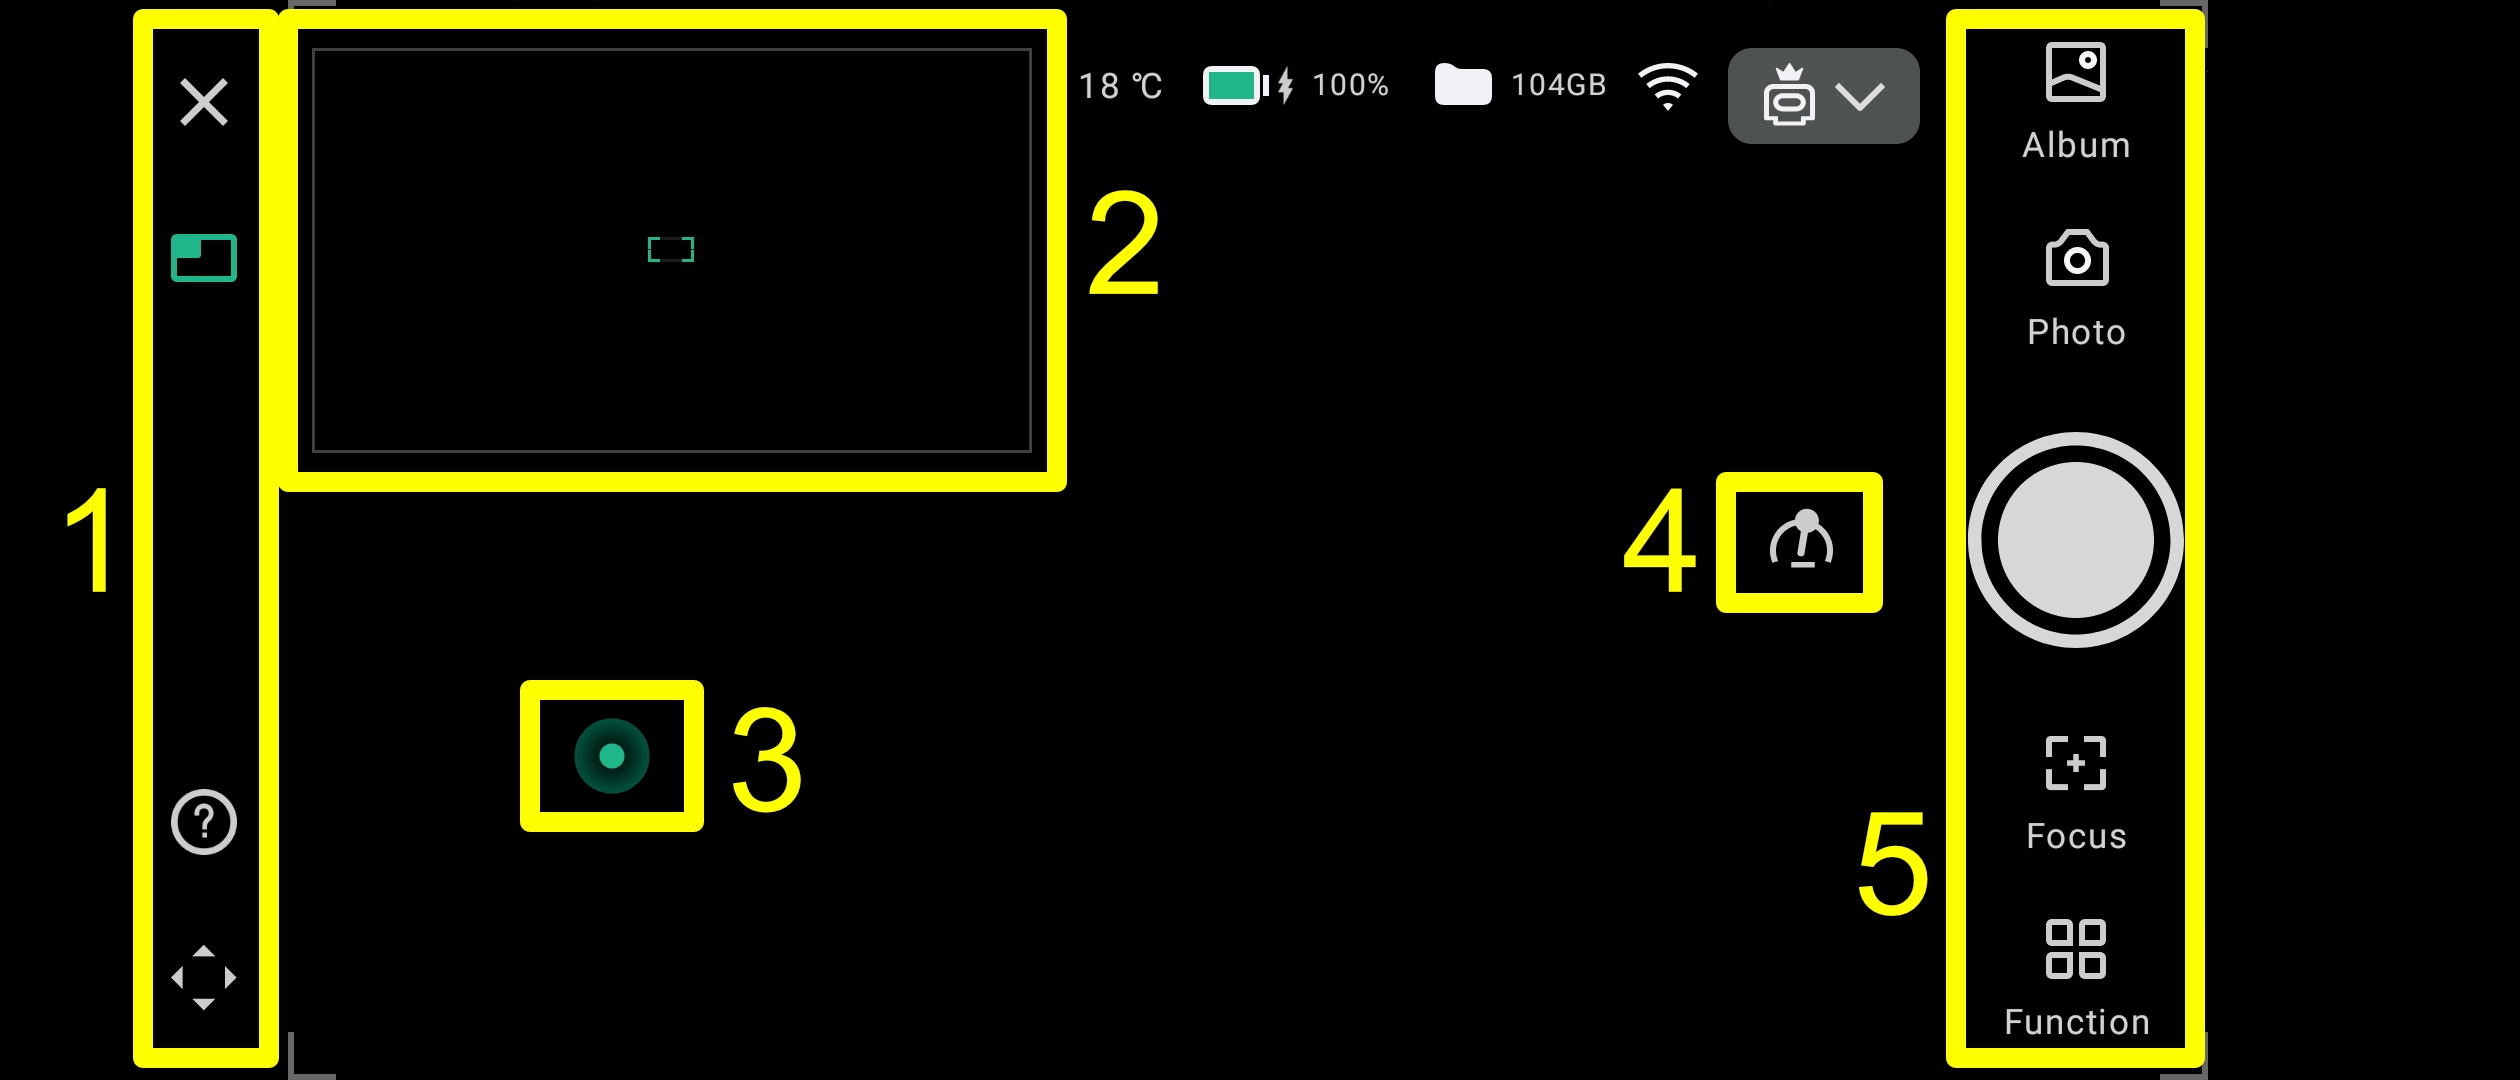
Box 1)
• The "x" will take you back to the home screen of the app. This will allow you to enter the settings menu if required and can be pressed at any time. This will not stop the imaging run as it will still run in the background.
• The Next symbol removes the box in a box view. This is the box numbered "2" (See below).
• The question mark opens help documentation.
• The last symbol in this box changes the directional movement mode (see 3 below).
Box 2)
This is the "secondary" view window. The main screen is filled with the view from the tele-lens, this is the lens used for astro-imaging.
The image in box 2 is the wide angle lens.
You can use the wide angle lens as a digital finderscope. This means that due to its wider field of view you can use it to find certain objects like the sun, moon or bright stars. This can be removed from the screen by clicking the "box-in-a-box" icon giving a full view of the main imaging window.
Box 3)
This is how you manually move your Dwarf III without the need to move the azimuth (left - right) or altitude (up - down) axis' with your hands.
The default is the joystick mode where you move a big dot in all directions to move the Dwarf. You can change this from a joystick to 4 arrows which will give you Up - Down - Left - right movements. Change this to your preference in box 1 above.
Box 4)
This little symbol allows you to change the speed at which your device slews about (moves). 1 = slow, 5 = fast.
Box 5)
This is the main settings for the selected mode. This is also where you change the imaging mode.
Click on "Photo" in the right hand box and it will bring up the available imaging modes. We are going to select "Astro".
At this point, click on "Focus" in the right hand panel and click on "Auto". This will focus the Dwarf 3.
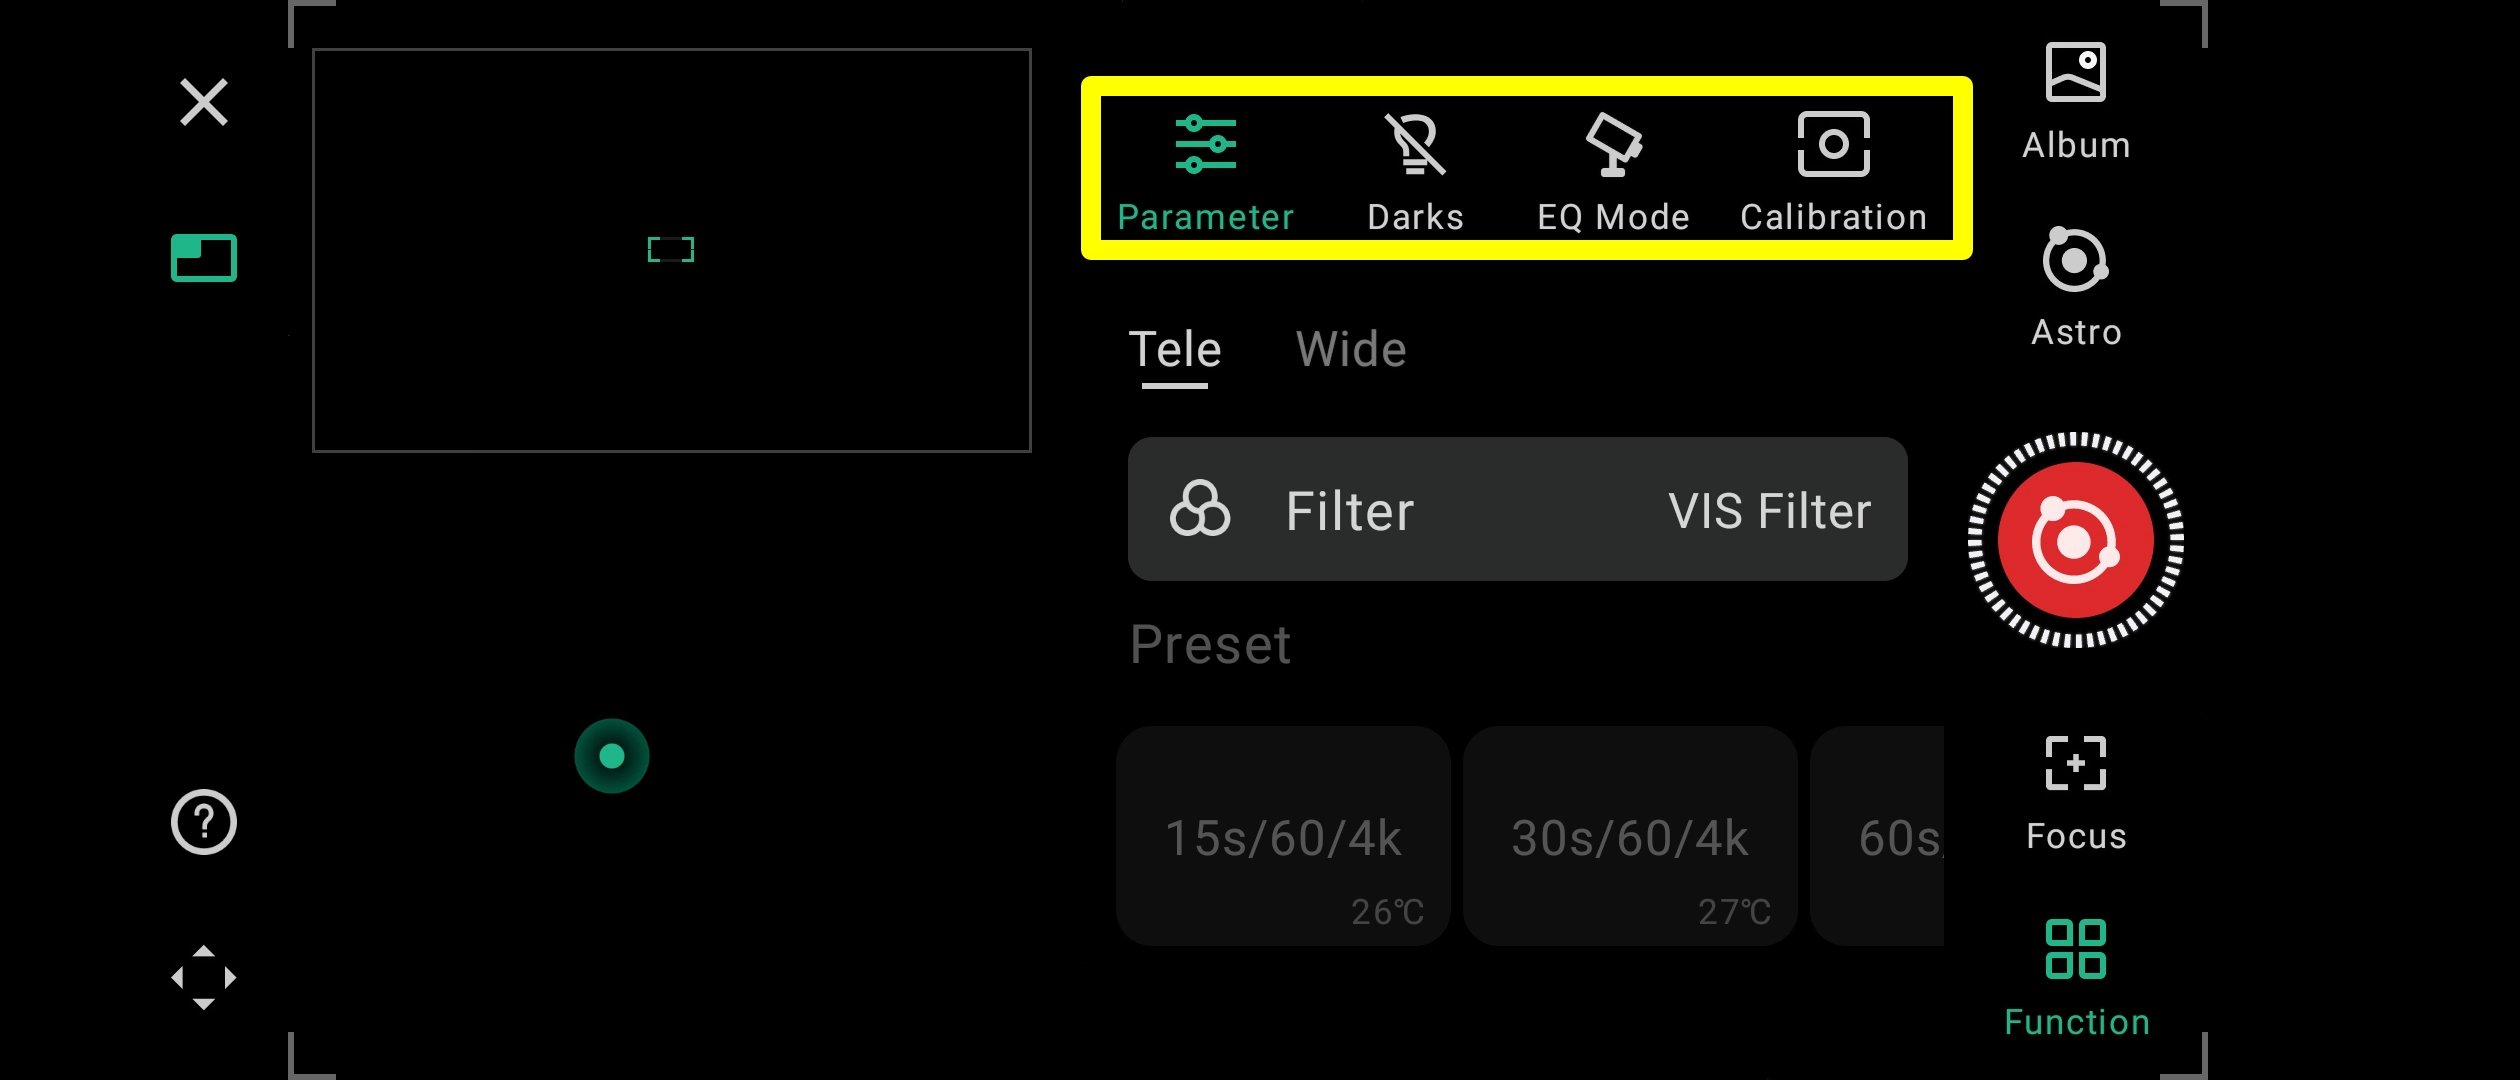
Now select "Function" on the right hand at the bottom under the big red button. This will open the features attributed to the "Astro Mode".
You will need to scroll this bar to the left to access the additional settings pictured here.
Click on the "Calibration" box and perform an initial calibration. This performs a sky alignment routine so that the Dwarf has an idea of where it is pointed.
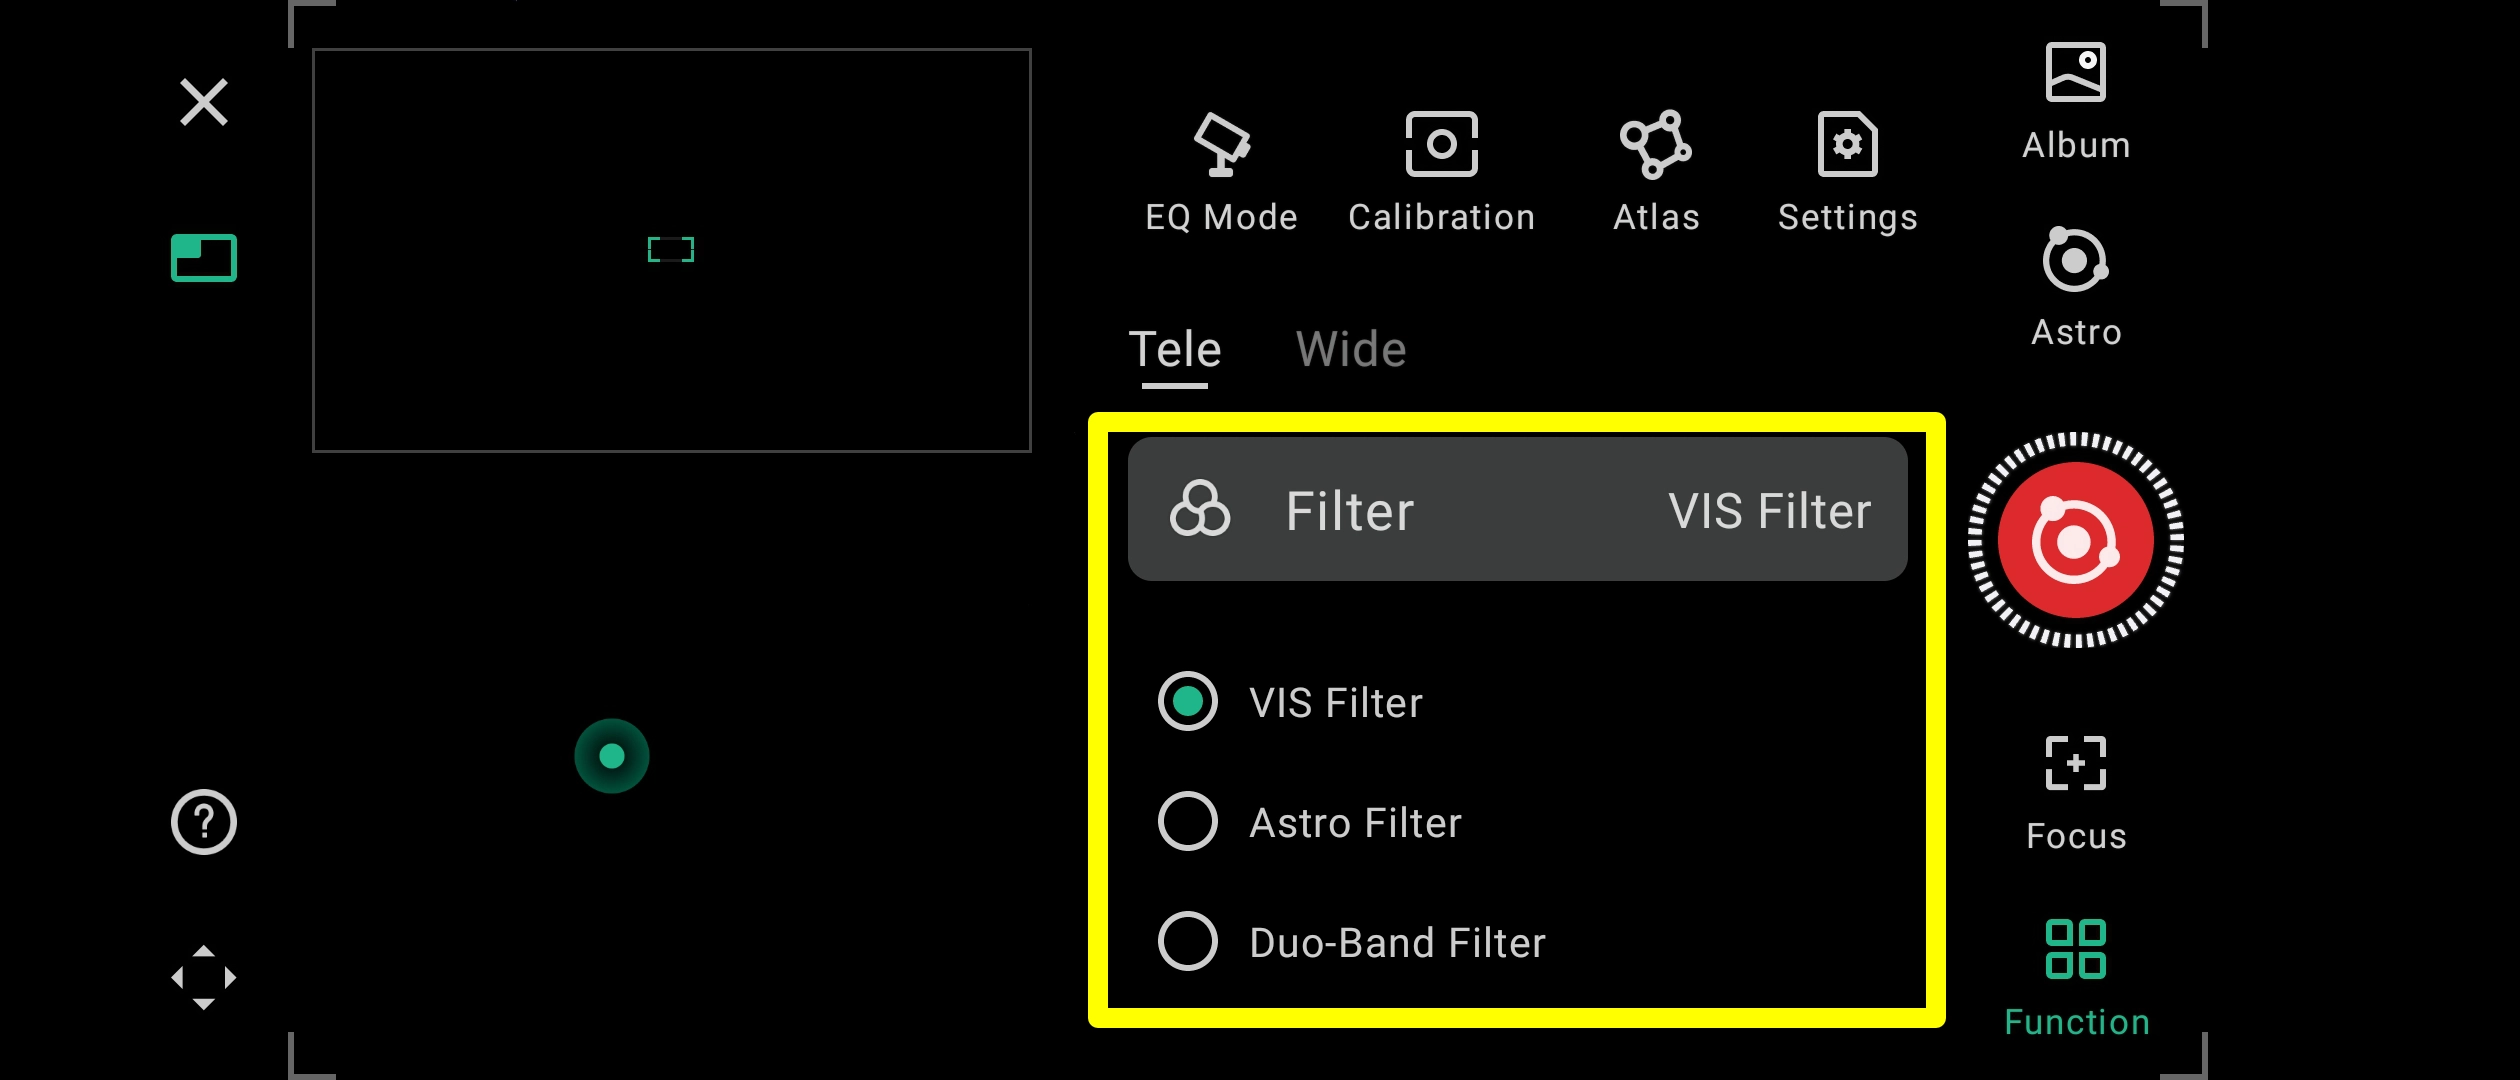
Now click on the "Parameters" box. Here you will select what filter is to be used for the imaging run.
* The VIS filter is used for daytime imaging and astro targets like Galaxies, Dark Nebulae and star clusters.
* The Astro filter is used for Reflection/Dark Nebulae, some Galaxies.
* The Duo-Band filter is used for Planetary Nebulae and Emission Nebulae.
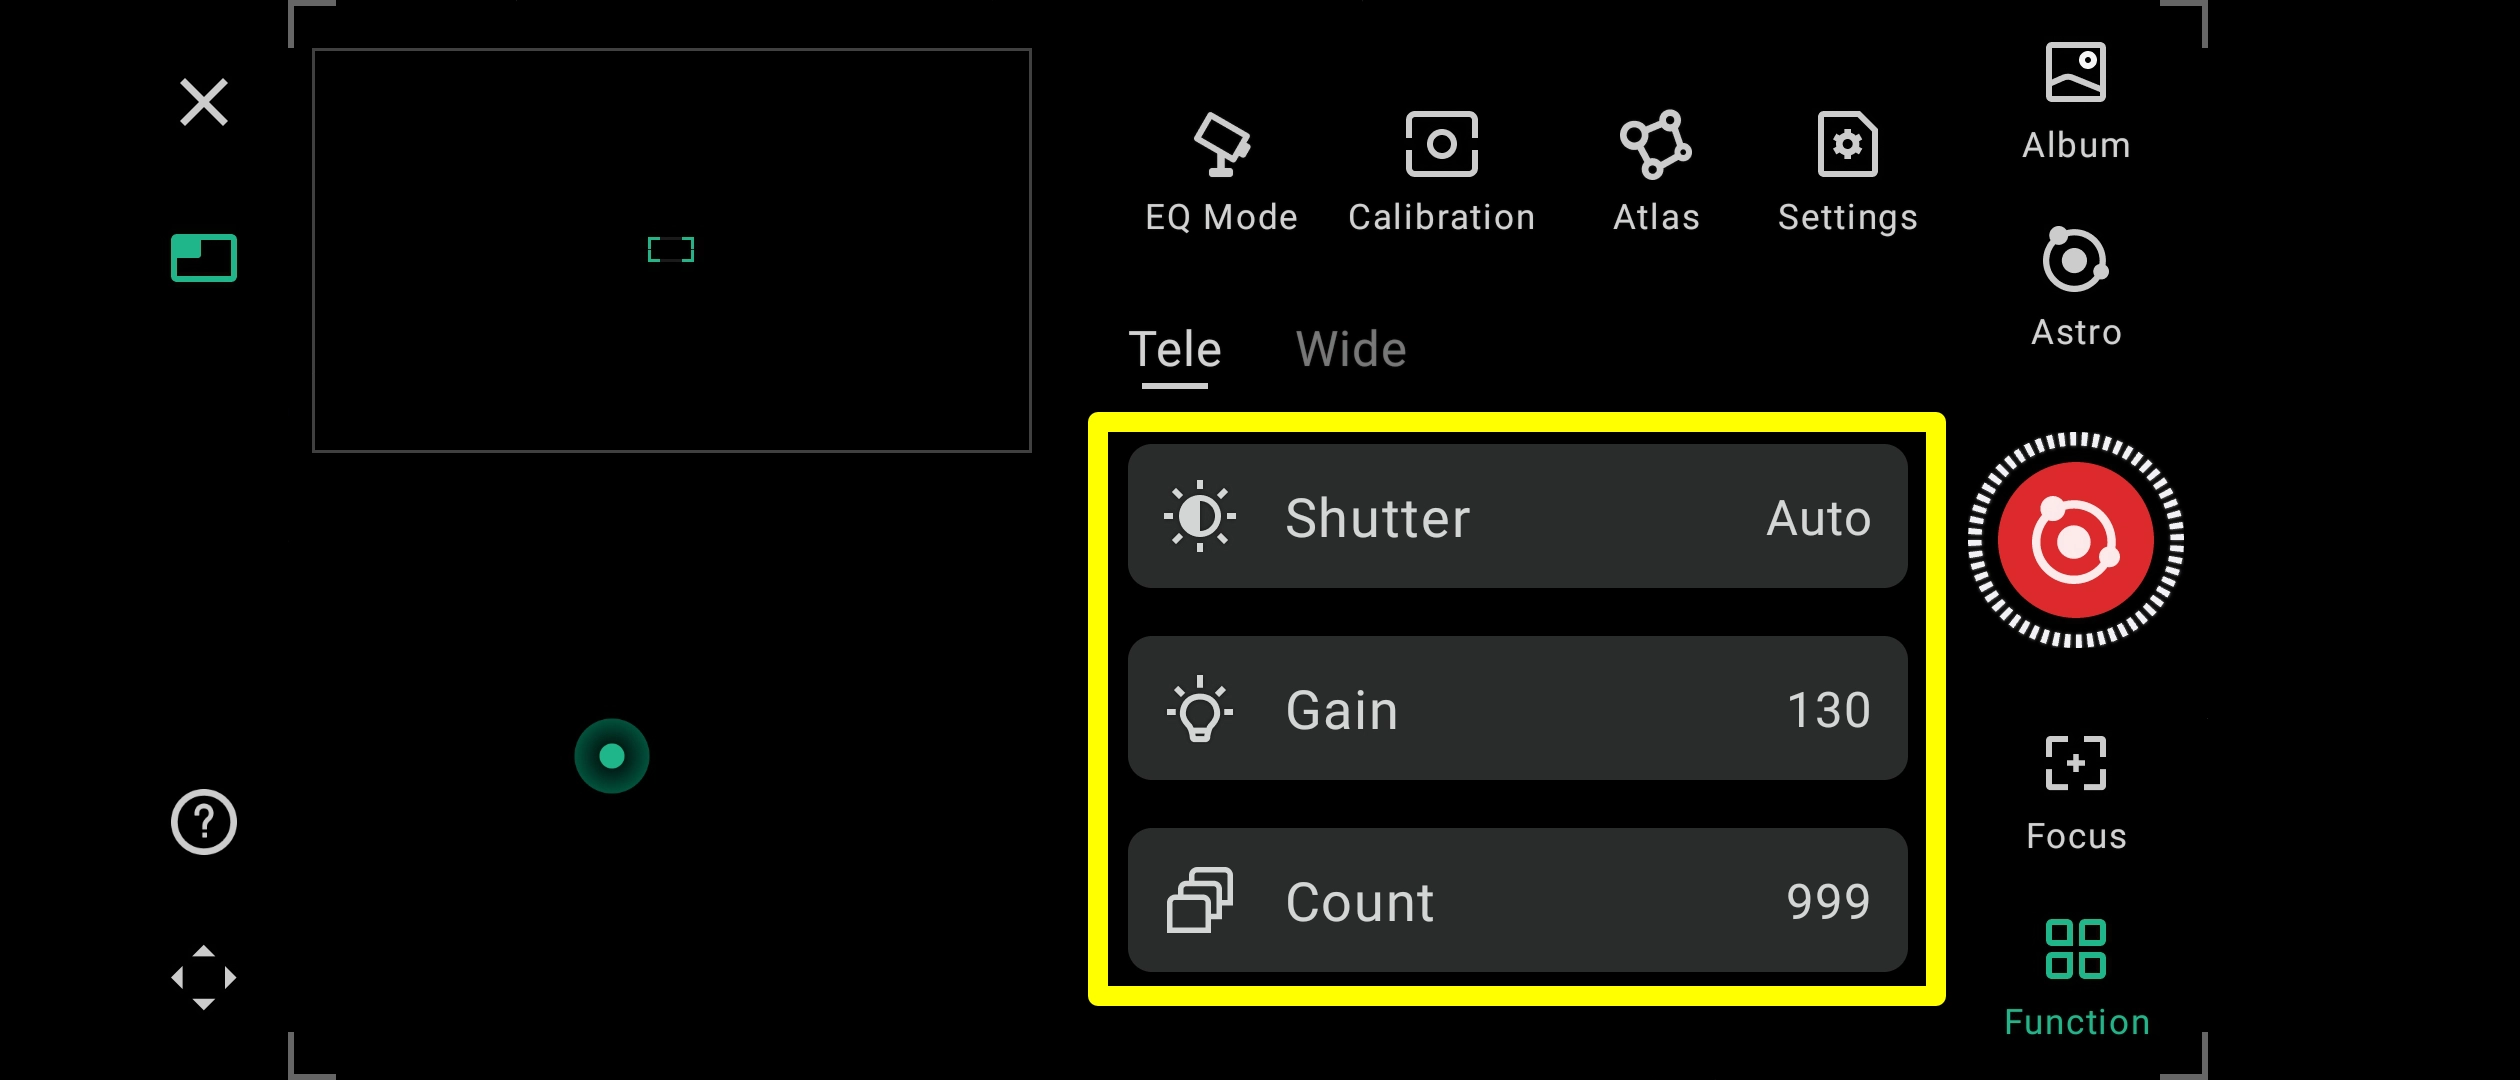
Scroll down below the filter tab and you will find the exposure, gain and count tabs. This is where you select the last settings for the imaging run..
* Shutter - move the slider to set each exposure length.
* Gain - move this slider to select the gain setting required. This is effectively digital brightness.
* Count - move this slider to select how many exposures are to be taken.
You are now ready to start imaging. Just click on the big red button, sit back, and watch your chosen target appear before your eyes on your screen.
You are now free to let the Dwarf 3 disconnect from your phone/tablet as the imaging run will carry on working. Just reconnect at any point and click the "Photo" button to check on the process as and when required.