I am looking for Language translators. If you can translate this page and any of the tutorial pages, and you are happy to volunteer your time to do it then I will be very grateful.
Online translators are not reliable and I would like to get the translations right.
Please contact me via email if you can help - paul@smartastro.co.uk
This tutorial will show you how to setup your Dwarf 3 in EQ (equatorial) mode.
For this setup you will need a 2-way tripod head that moves left, right, up and down, as the device will need to be moved about while keeping the tripod legs static.
By Polar aligning your telescope you will be able to take longer exposures with your Dwarf 3. This mode allows you to take exposures longer than 30 seconds without trailing.
00) Enter EQ Mode by selecting "Astro mode". Click the "Function" button and select "EQ Mode" from the menu that appears.
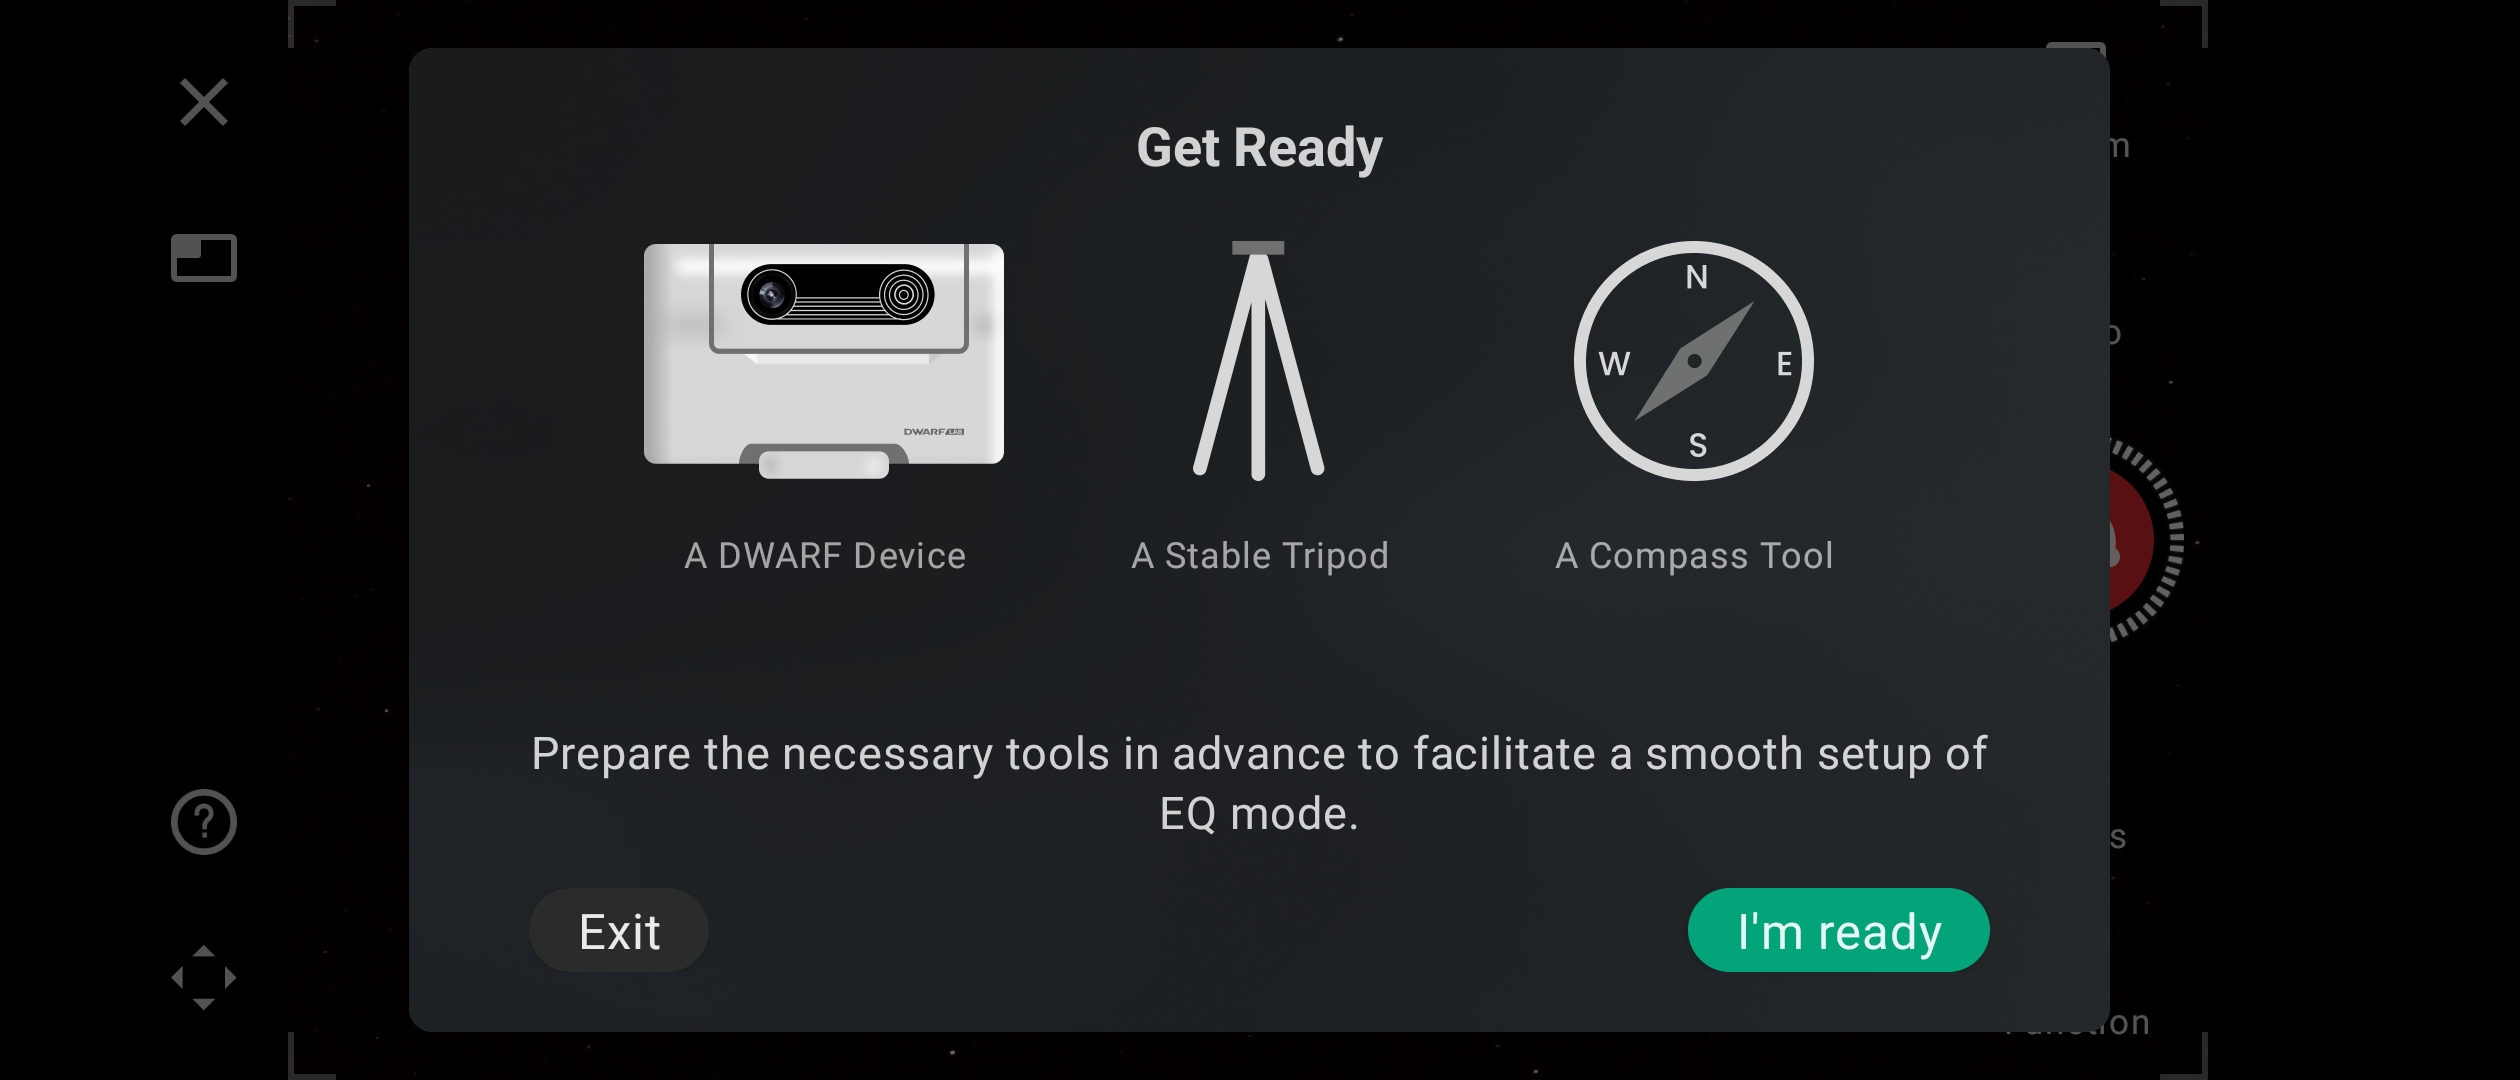
This box pops up letting you know what you will need. The compass is only relevant if you cannot see Polaris or if you need help finding north.
Click on "I'm ready".
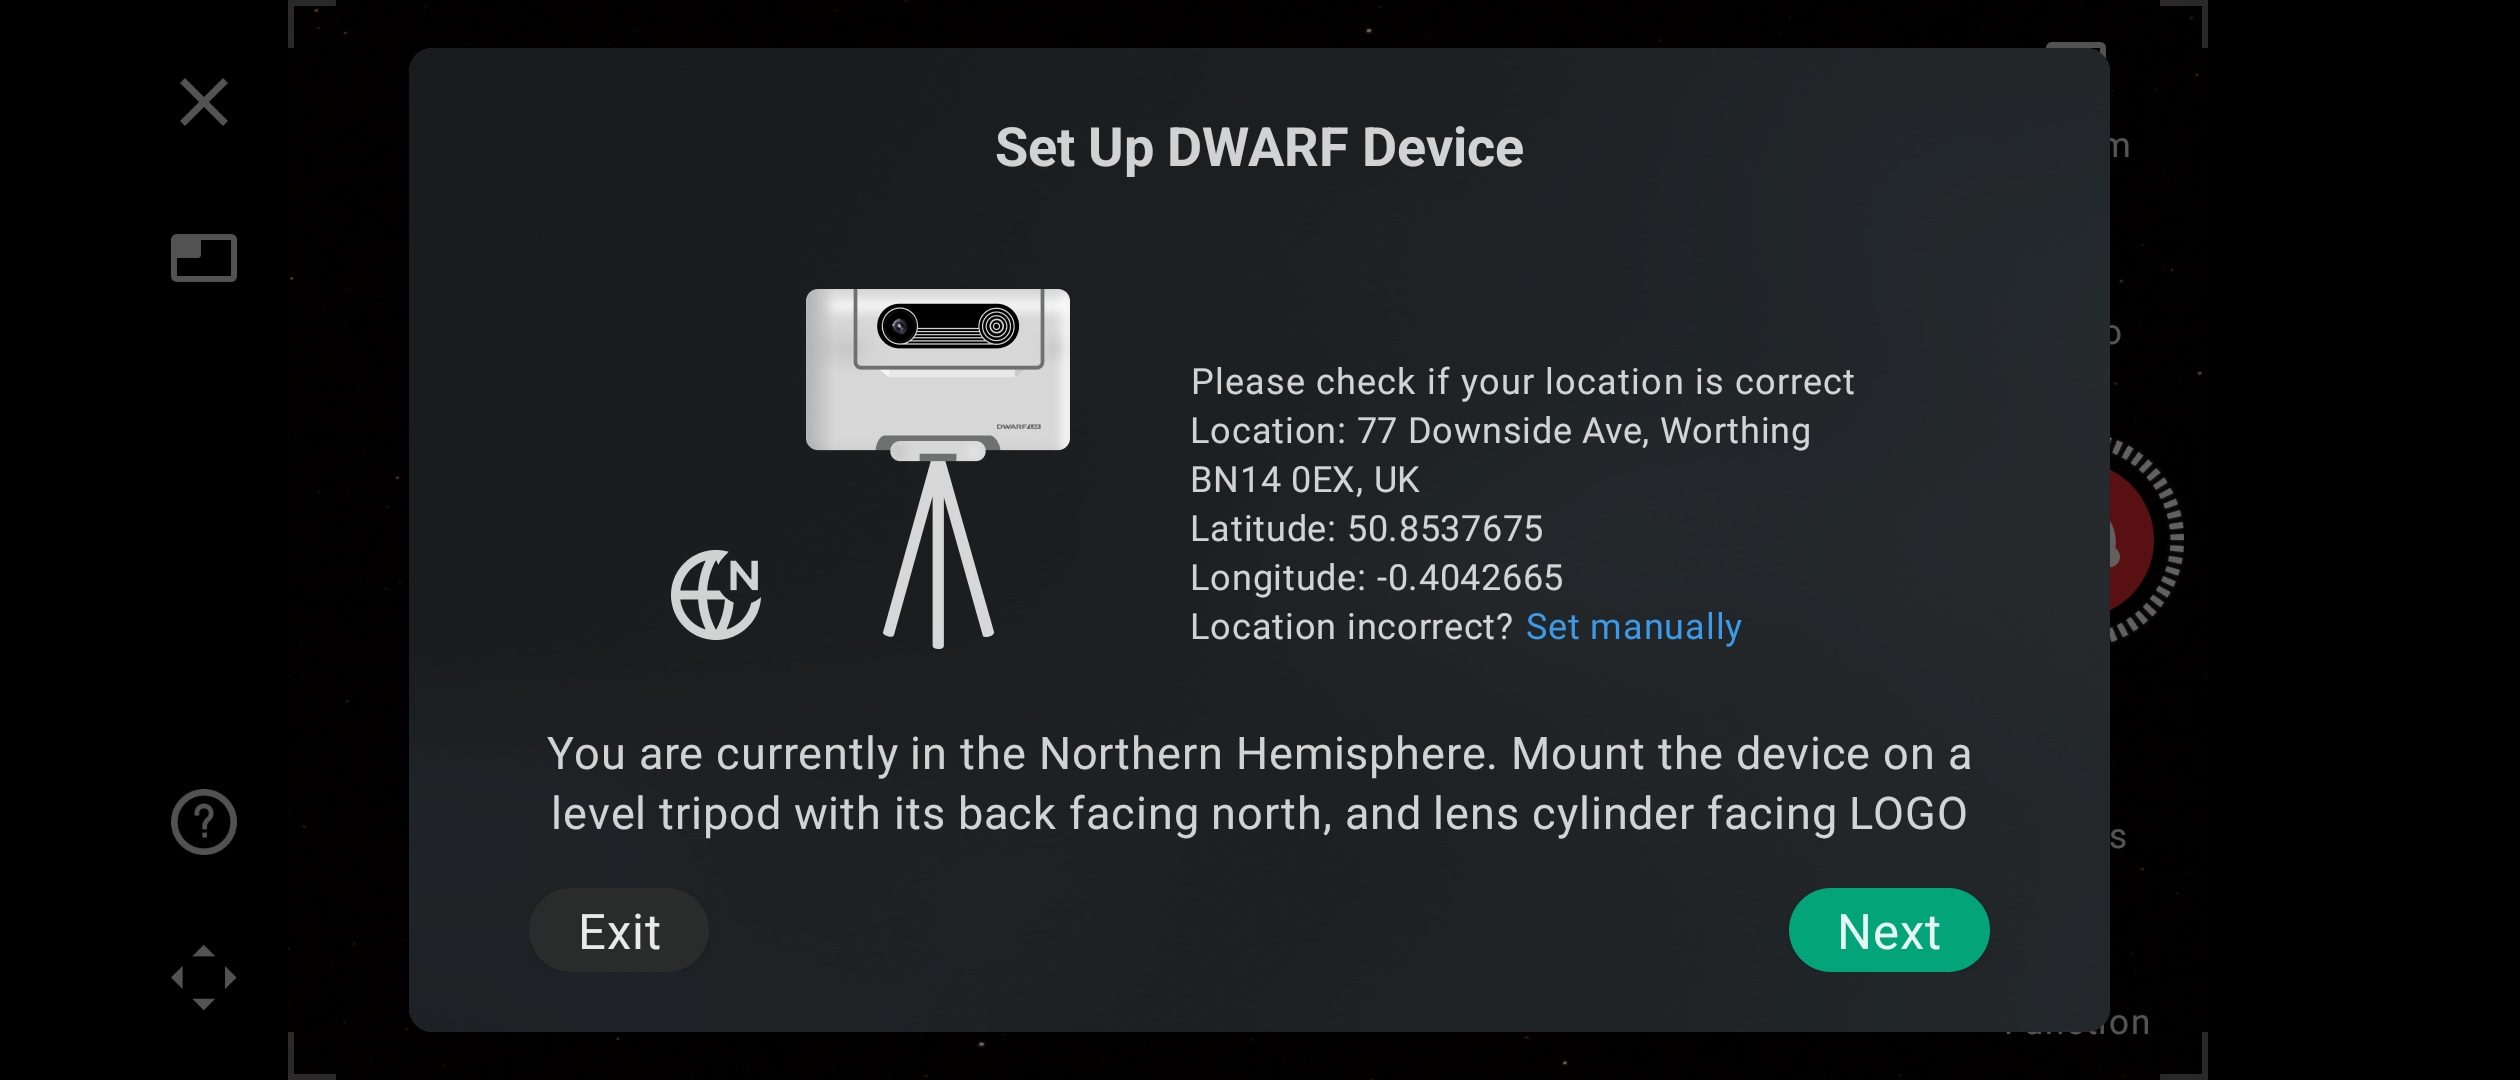
01) This box gives your location details and tells you how to set the Dwarf unit on the tripod.
Ensure that the information is correct and setup the Dwarf device as per the instructions then click "Next".
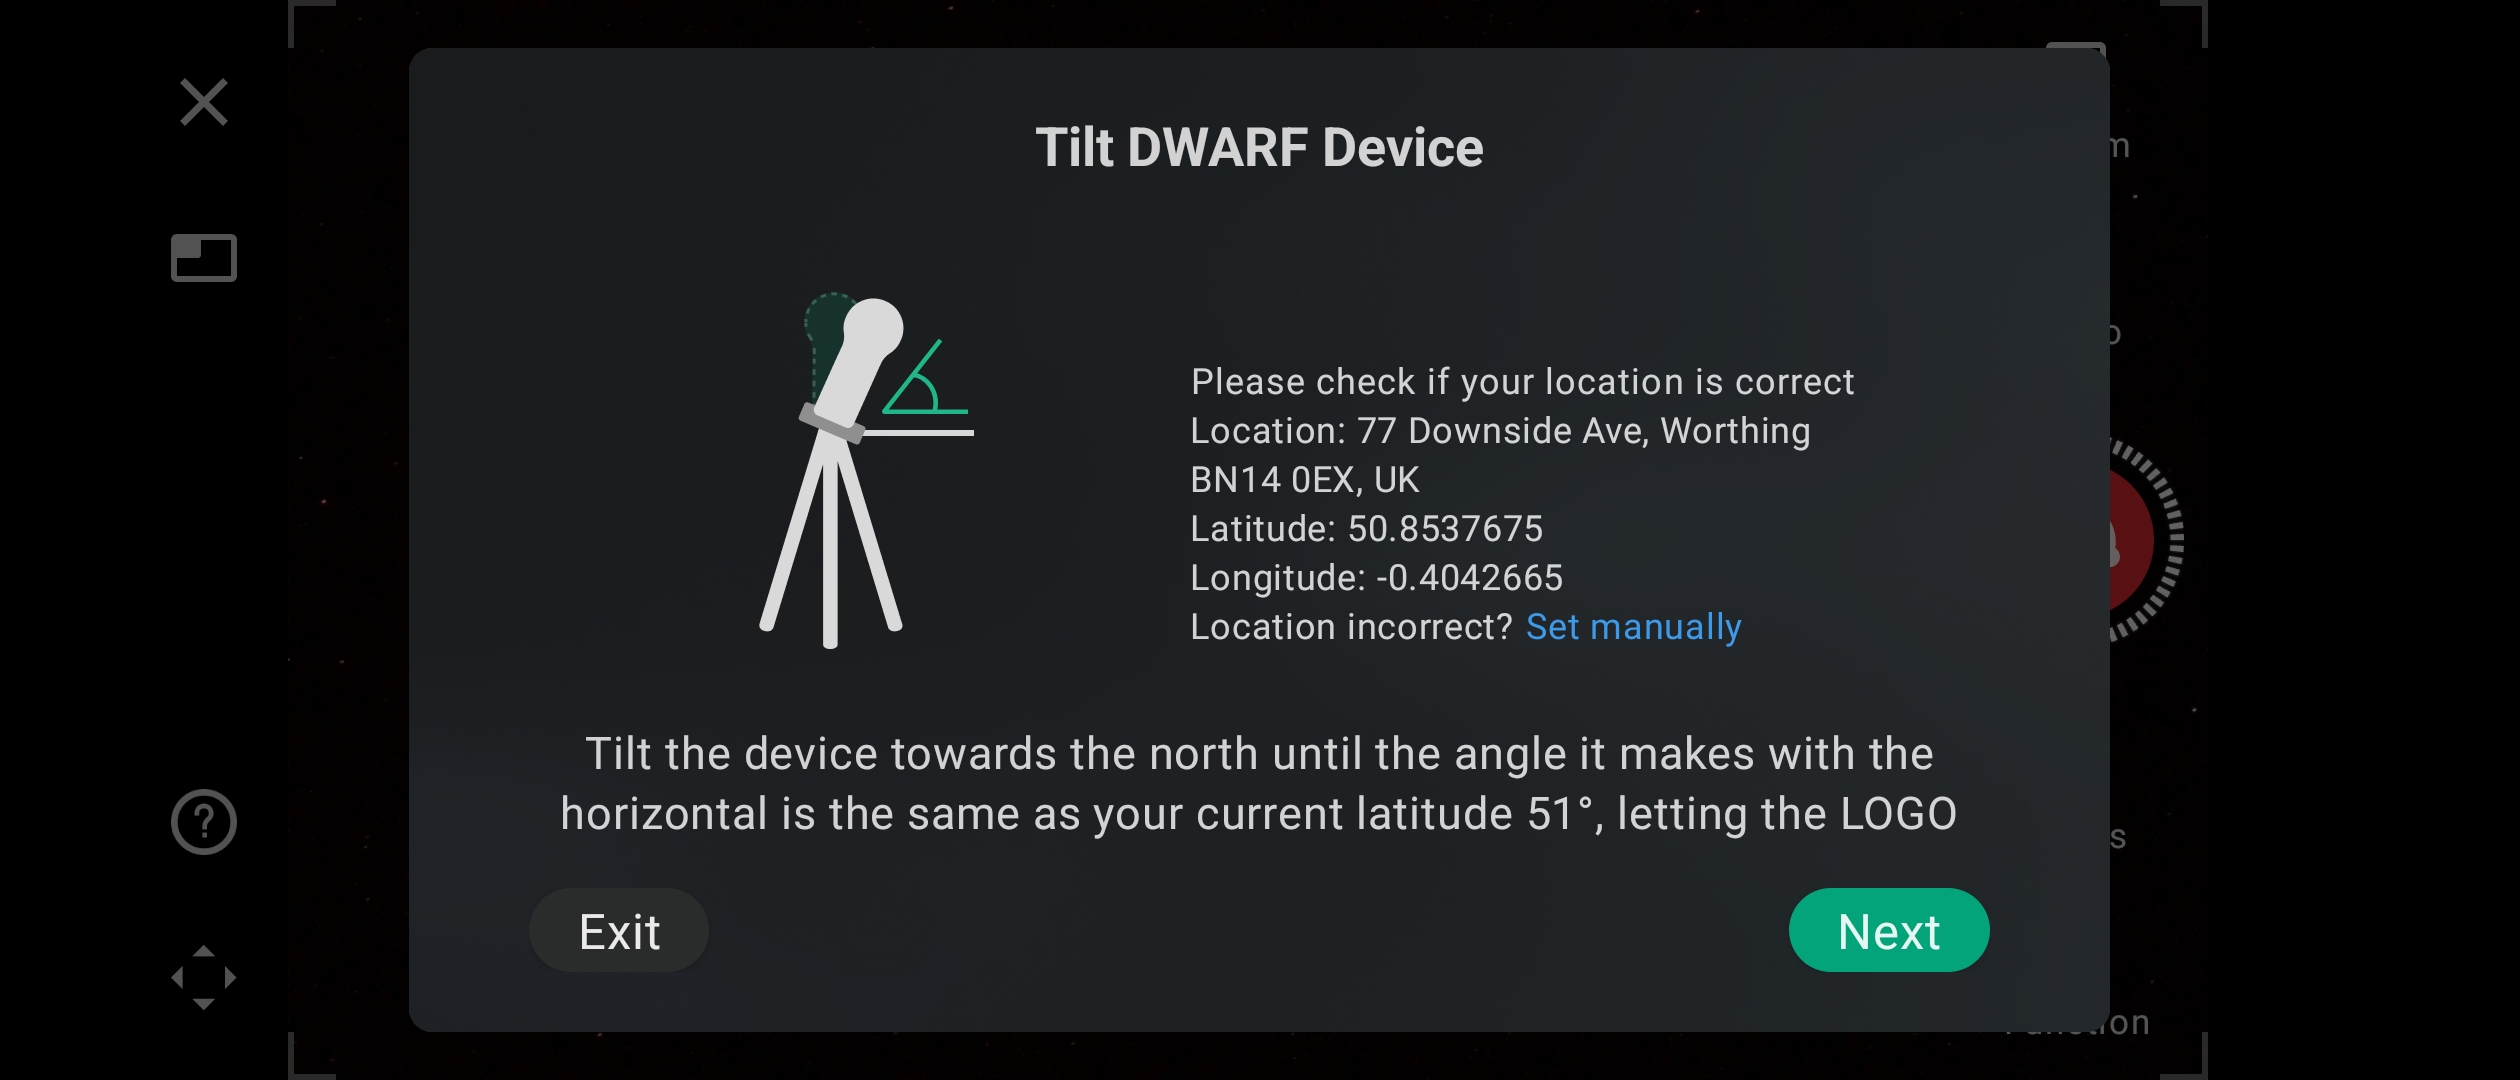
02) This box will give you the ideal declination (tilt) for your location.
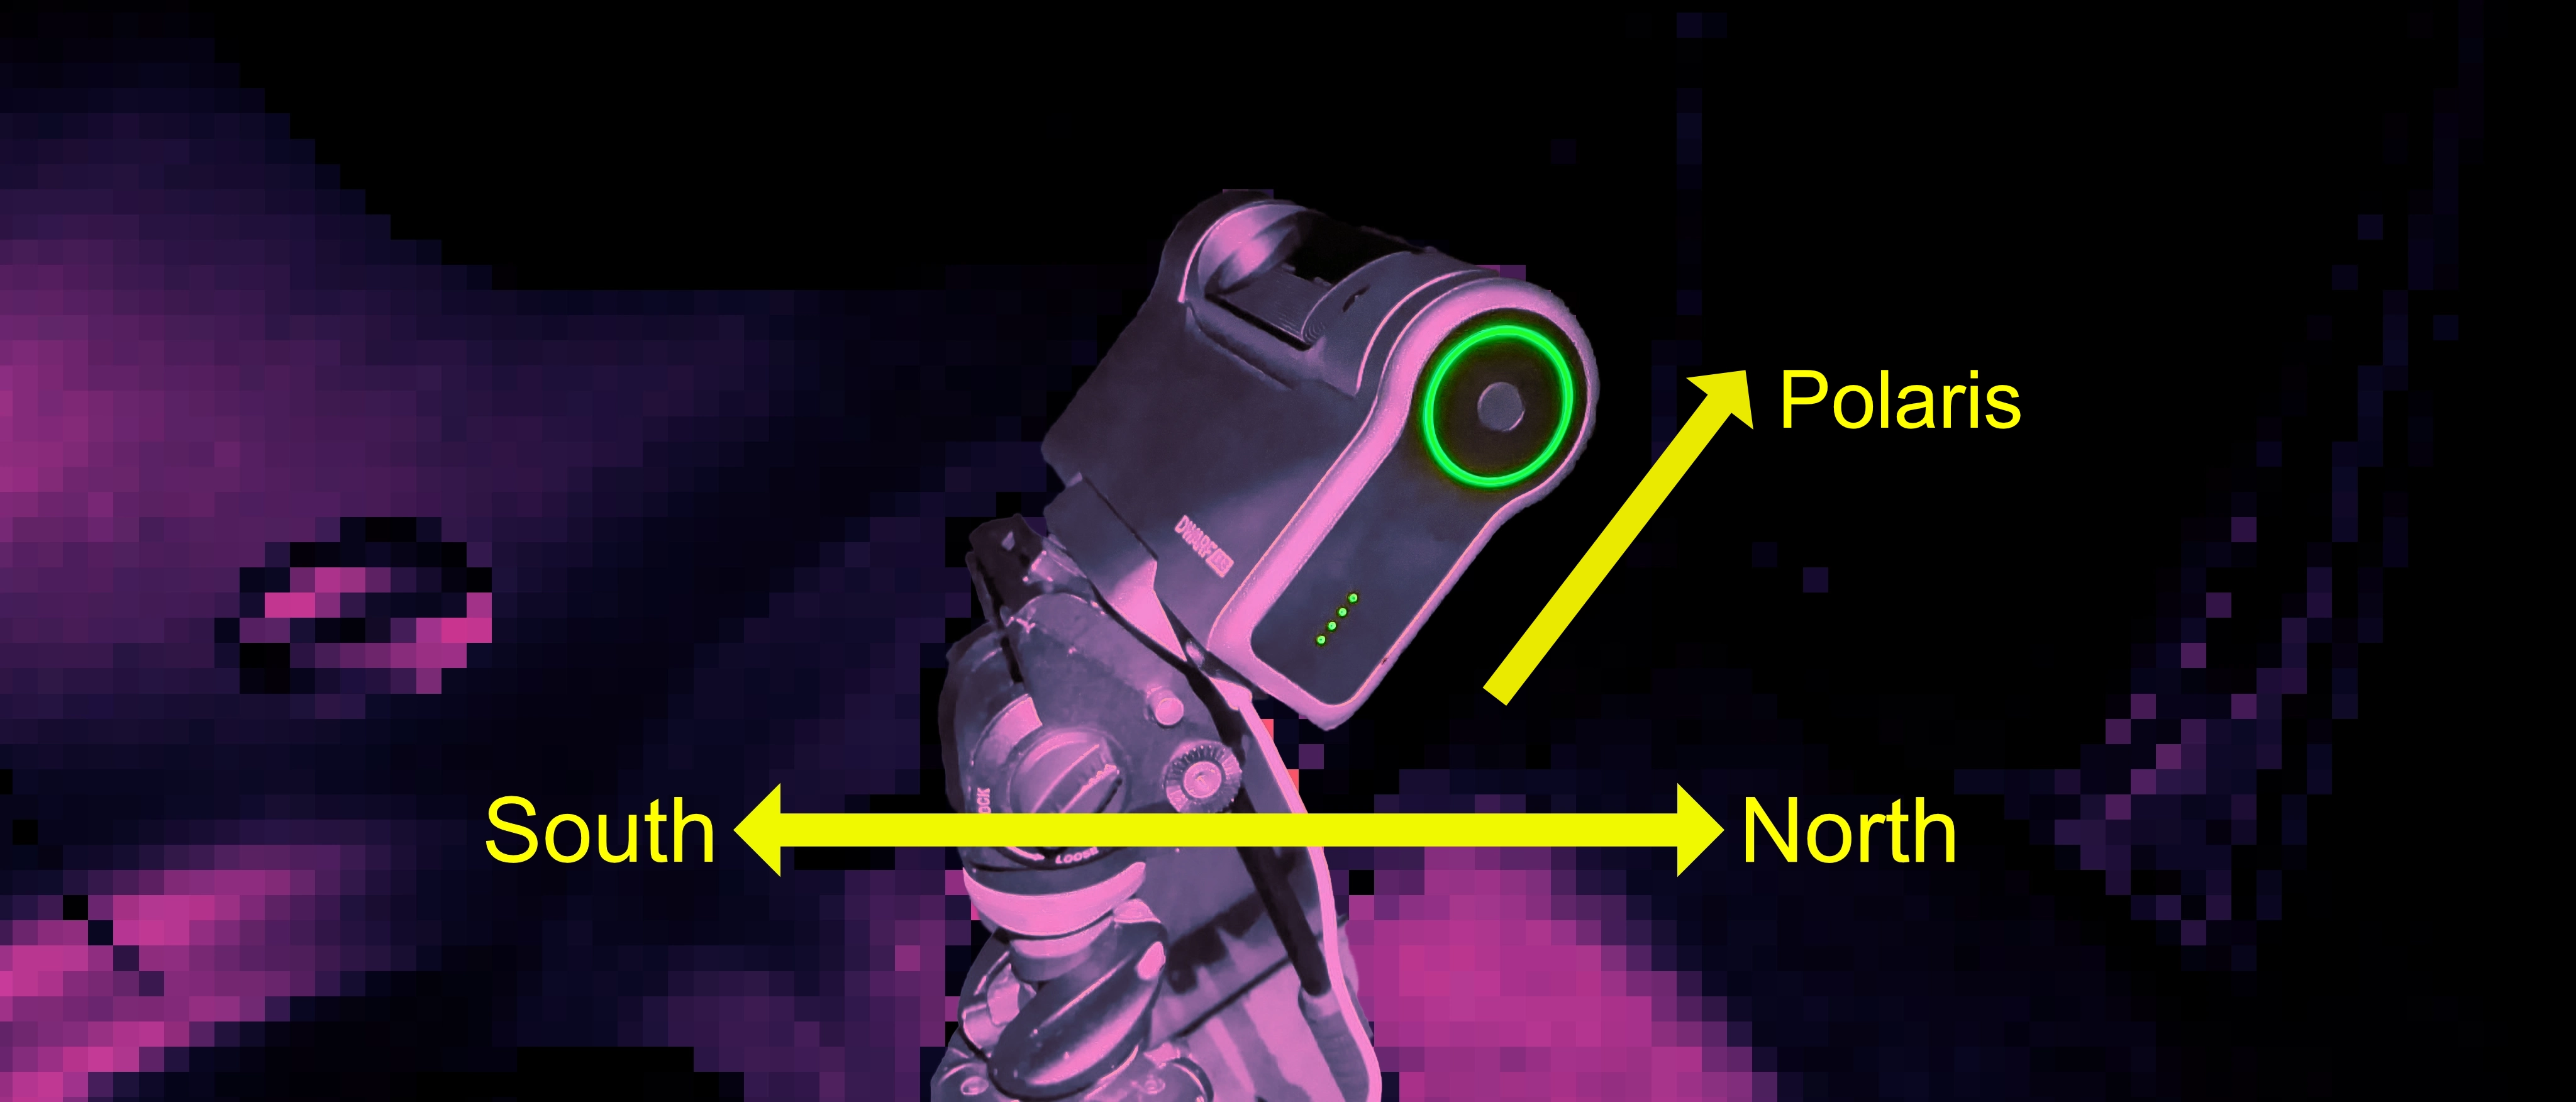
03) By following the instructions in the above box, your Dwarf should be facing in the direction shown.
The back of the unit will be facing north with the front (Dwarf logo) facing south. Rotate the lens up so that it faces forward, either by hand or by using the on-screen joystick control.
The unit should now be tilted backwards with the top of the unit pointing roughly towards Polaris.
Click "Next".
04) After clicking Next the Dwarf will take some pictures to see how close to Polar alignment you are.
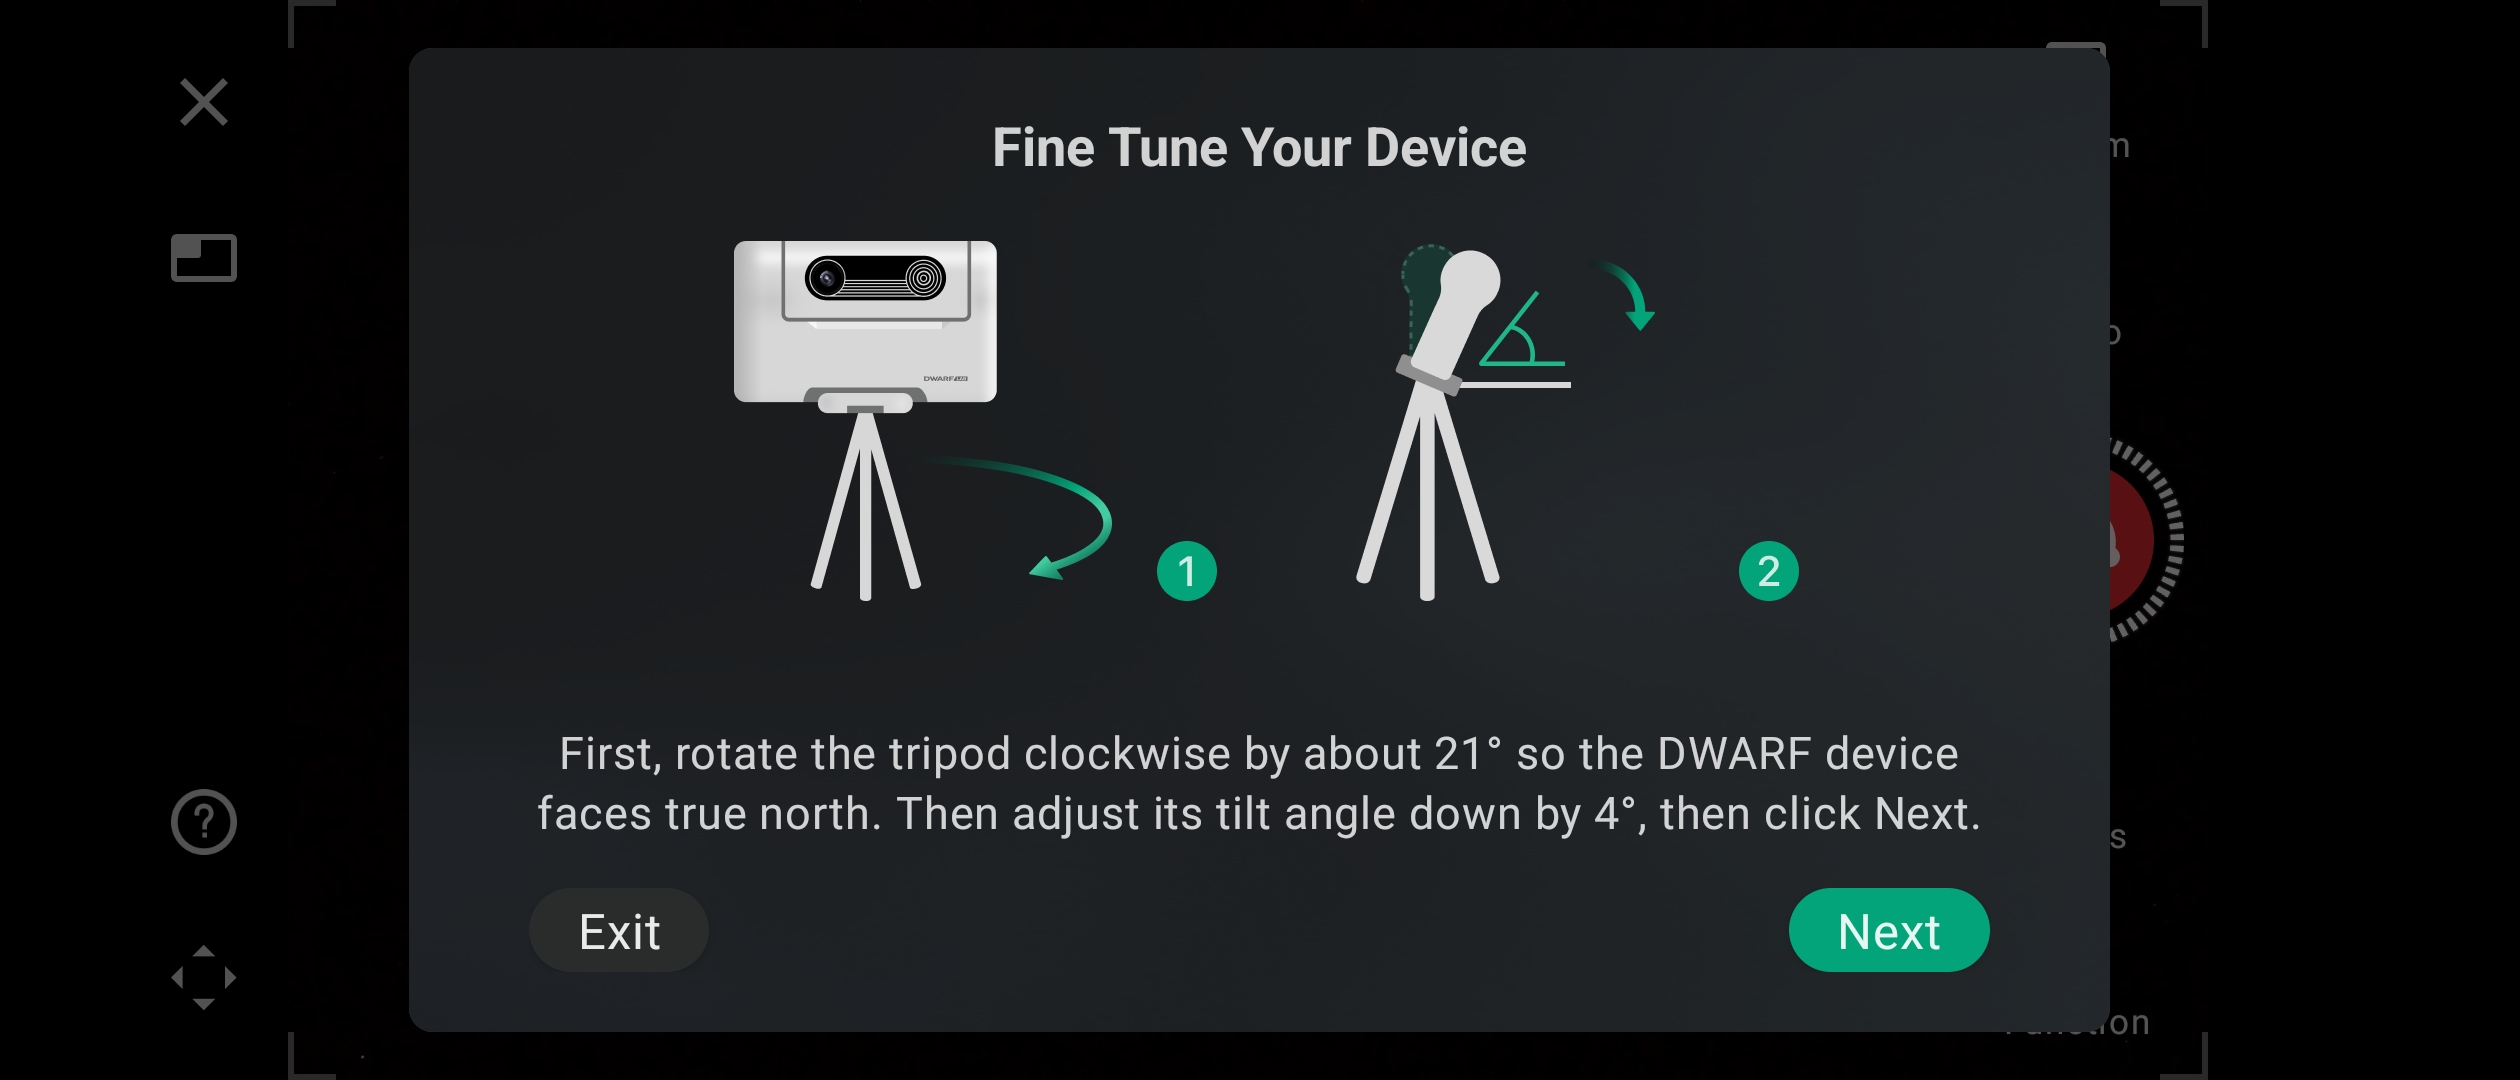
This box will appear telling you how far out the device is and in which directions you need to make adjustments.
Make the relevant adjustments given on the screen by rotating the tripod head, tilting the Dwarf or both.
Do not move the whole tripod, the legs should stay where they are.
Repeat this proces making the required adjustments each time until you get the box in the image below.
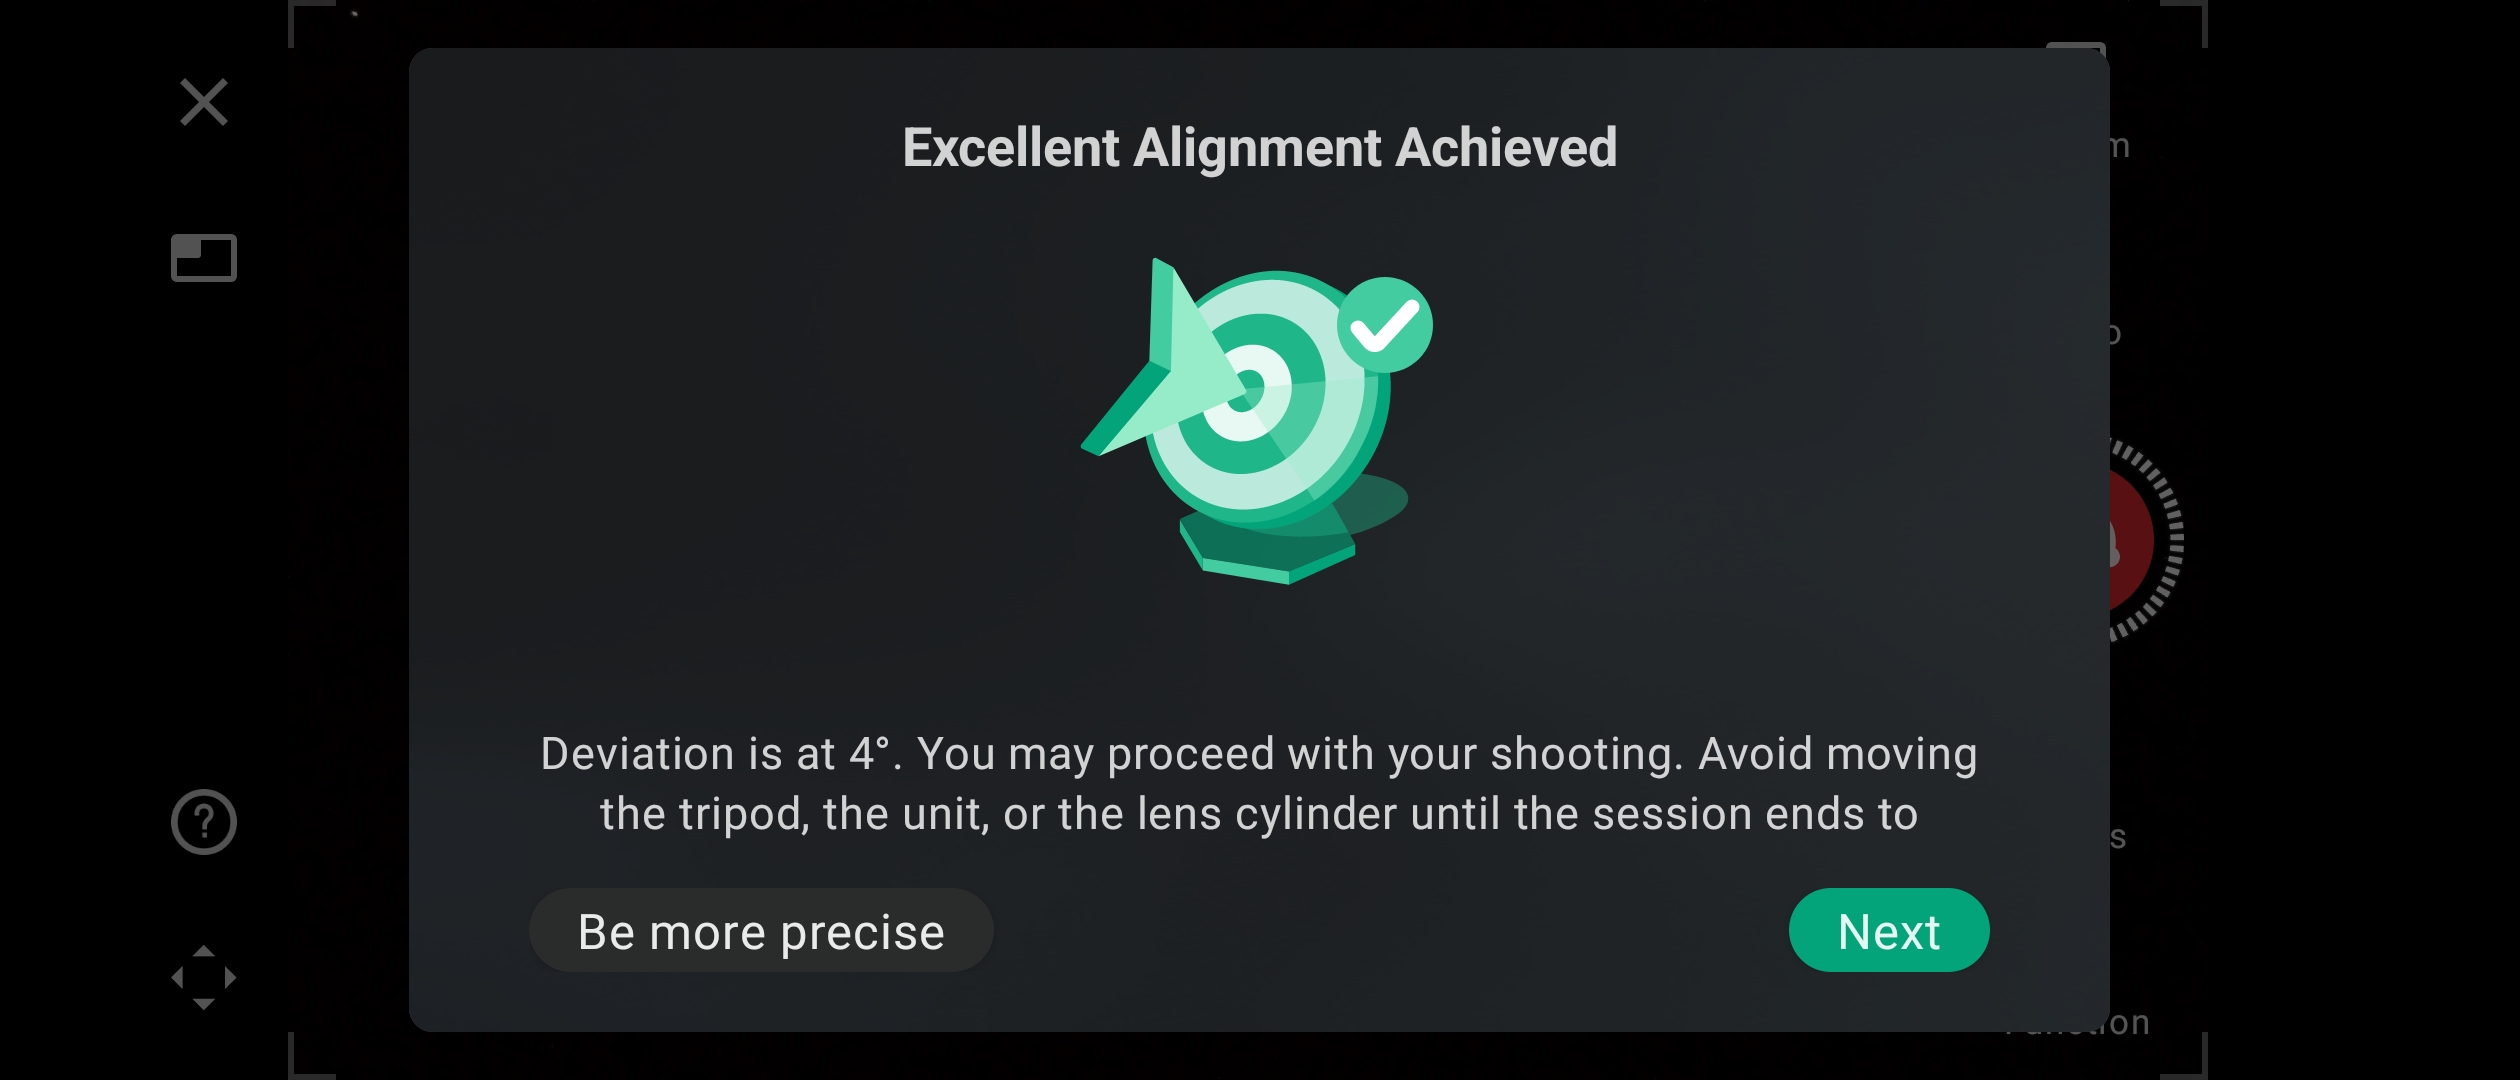
05) This box means that you have achieved what the Dwarf deems to be a good Polar alignment and it will let you exit here and start imaging.
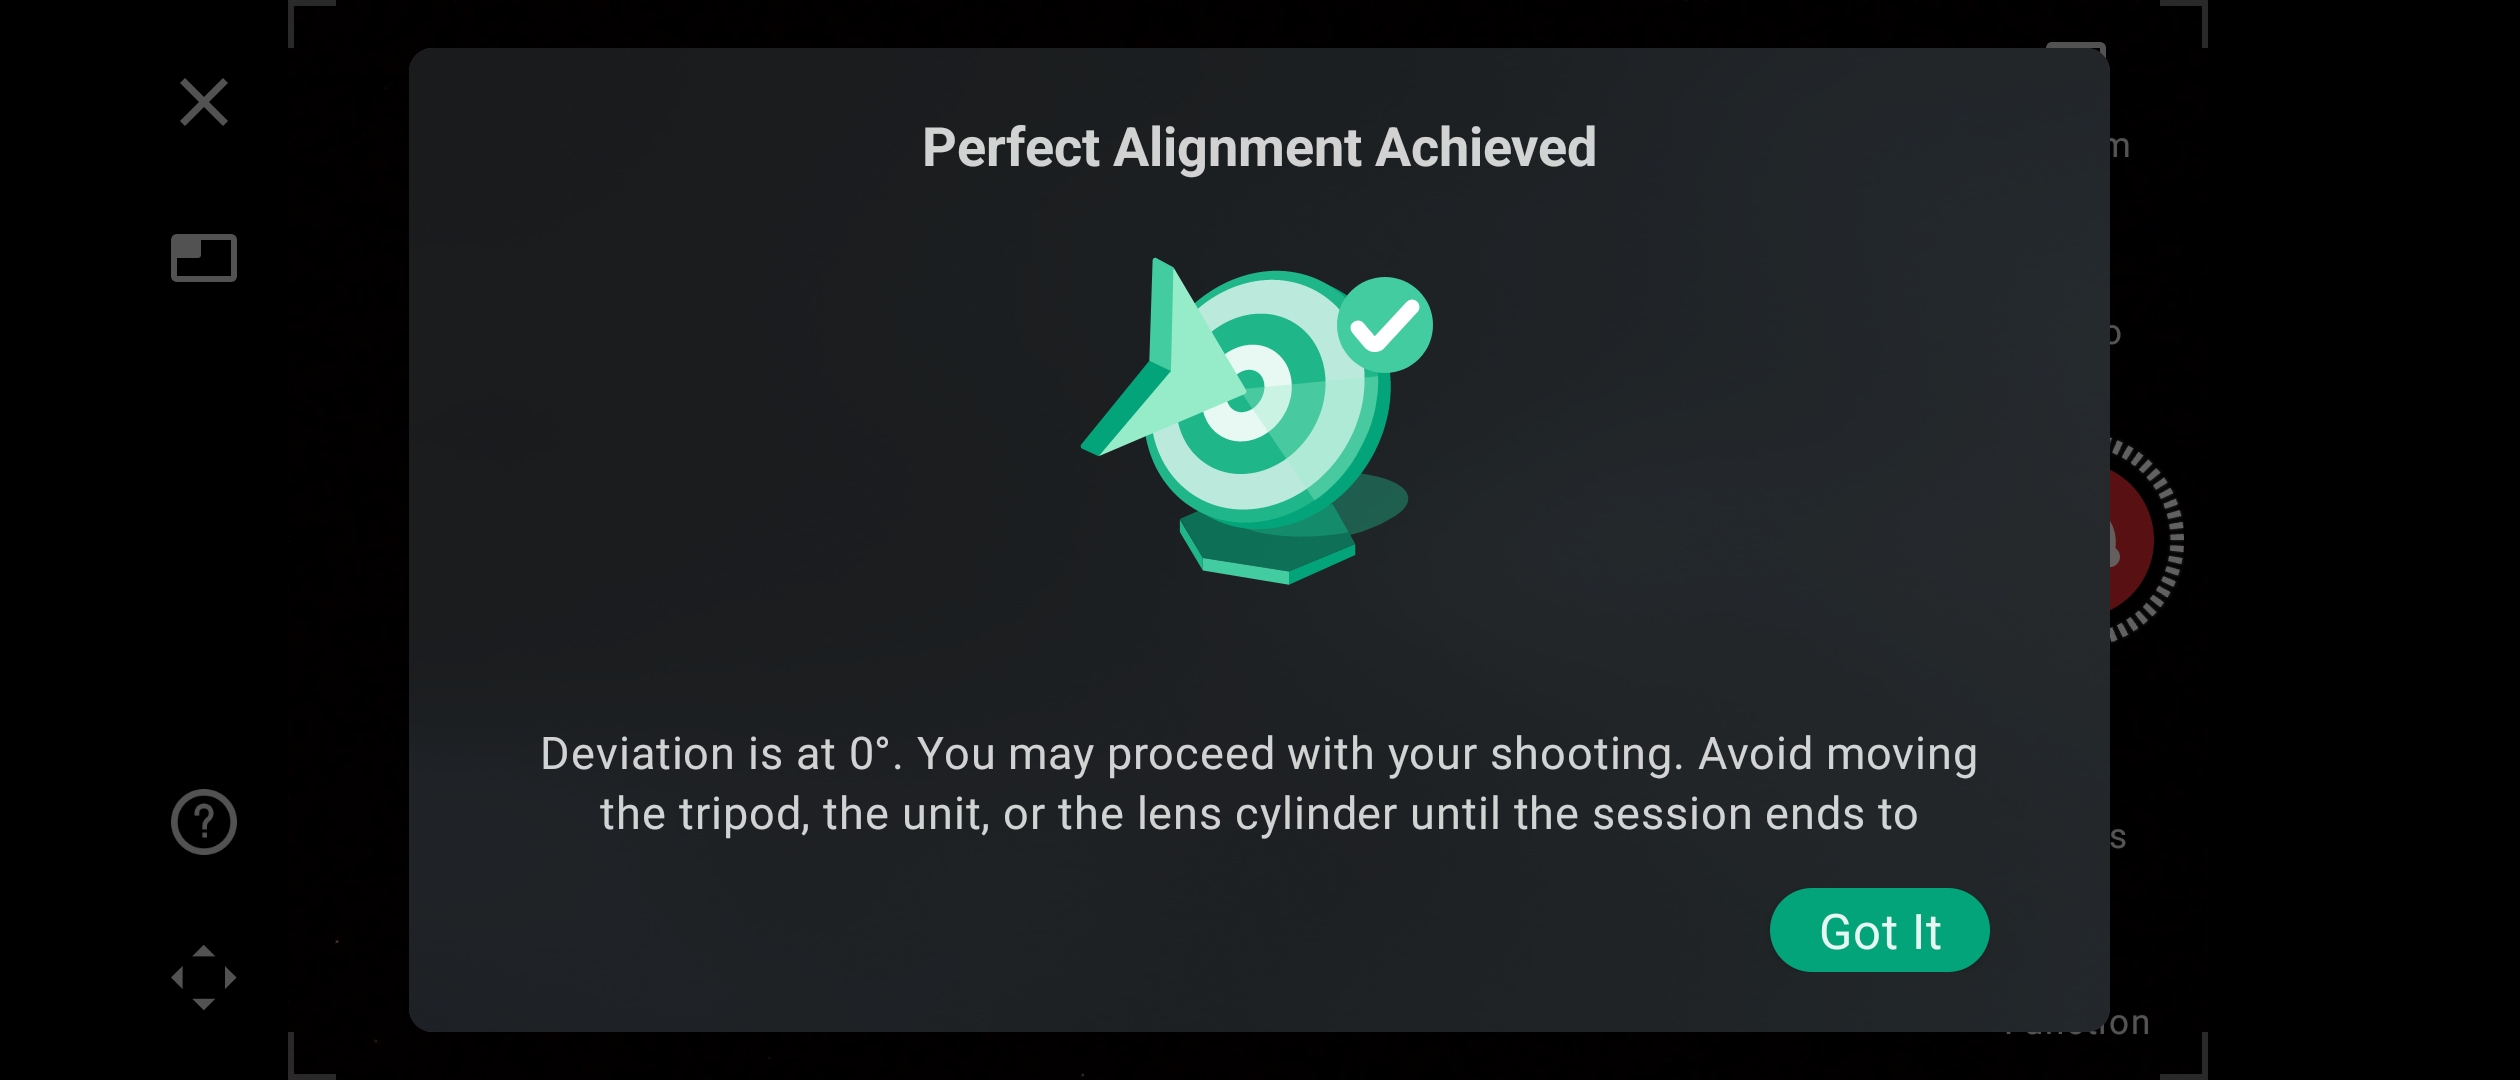
To get the best possible images, especially if using 60s or 120s exposures, then you will need to be more precise by achieving a deviation of 0.
By clicking "Be more precise" the Dwarf will carry on with the alignment process allowing you to make further adjustments in order to reach a deviation of 0.
08) Once perfect alignment has been achieved, Click "Exit".