Even though the Dwarf III stack internally as each single exposure is aquired giving you a "live" stacked image on your mobile or tablet screen which is perfectly suitable for most people, you also have the option to take these individual subs and stack them in your favourite stacking software for further processing.
Affinity is a "one-stop" shop for astrophotography stacking and processing all in one handy bit of software. The processing is similar to PhotoShop but with some additional and more powerful tools. Unlike PhotoShop, Affinity is a one-off payment of £67.99
For this tutorial I have used the subs taken via my ZWO Seestar to show how easy Affinity is to use when both stacking and Processing. This will be exctly the same process for other smart telescopes like the Dwarf III or any other telescope setup, be it smart or traditional.
Stacking
Firstly, you need to remove the individual subs (otherwise called light frames or lights) from the device or camera you have used to capture your target.
Smart telescopes are usually connected to your computer via WiFi or a cable. DSLR subs are also transfered via a cable or by inserting the SD card into the computer. If you have multiple sessions on a target, ensure that these sessions (along with each sessions callibration frames) are in seperate folders.
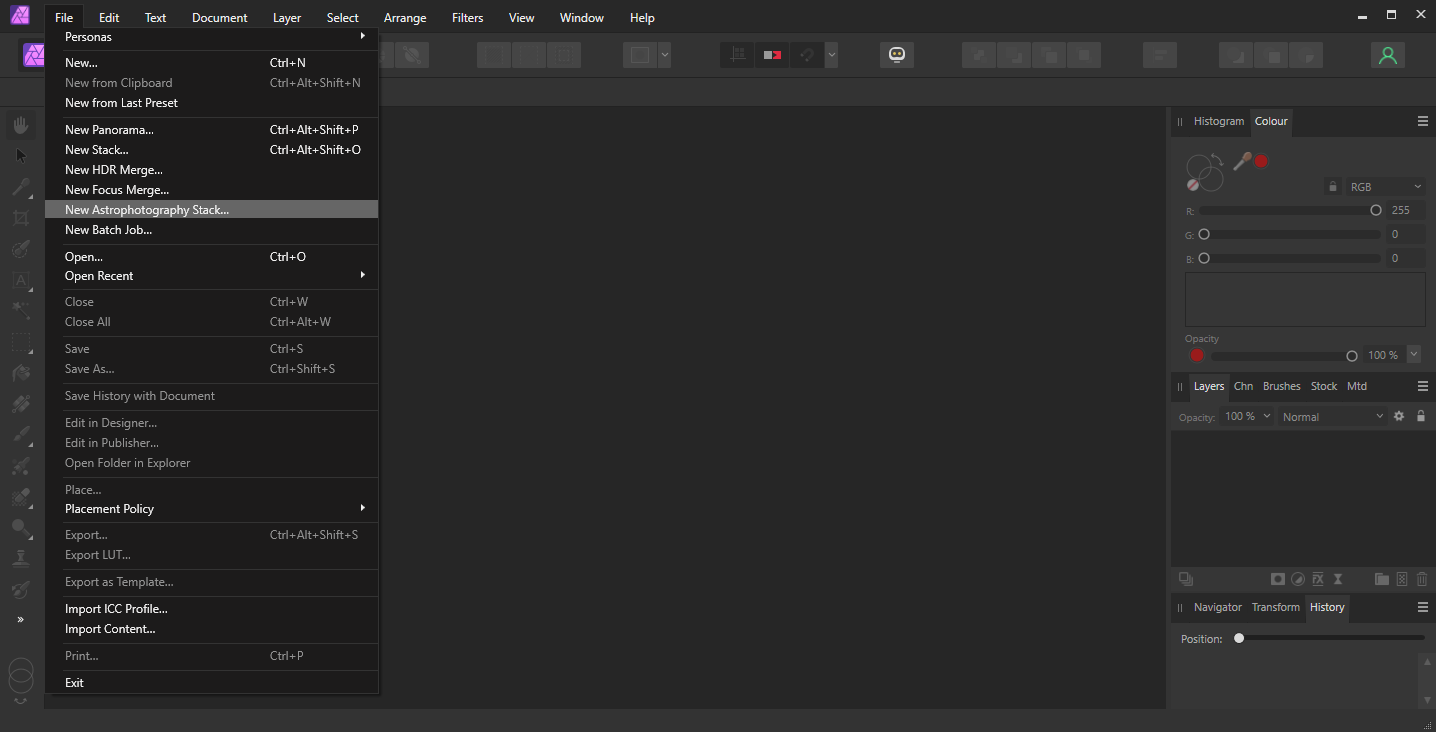
1) Open Affinity Photo and click on "File" in the top menu bar.
2) Click "New Astrophotography Stack"
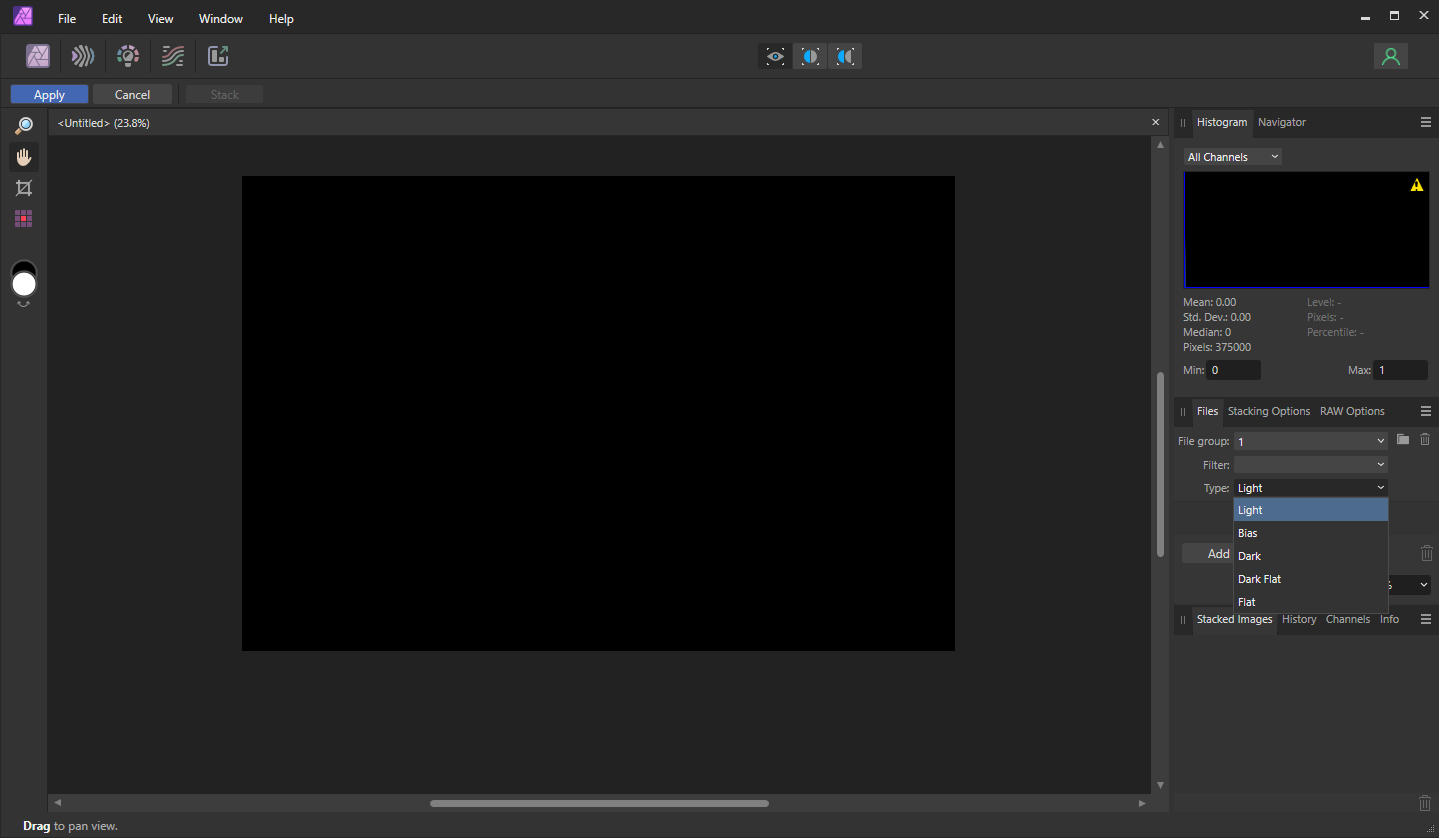
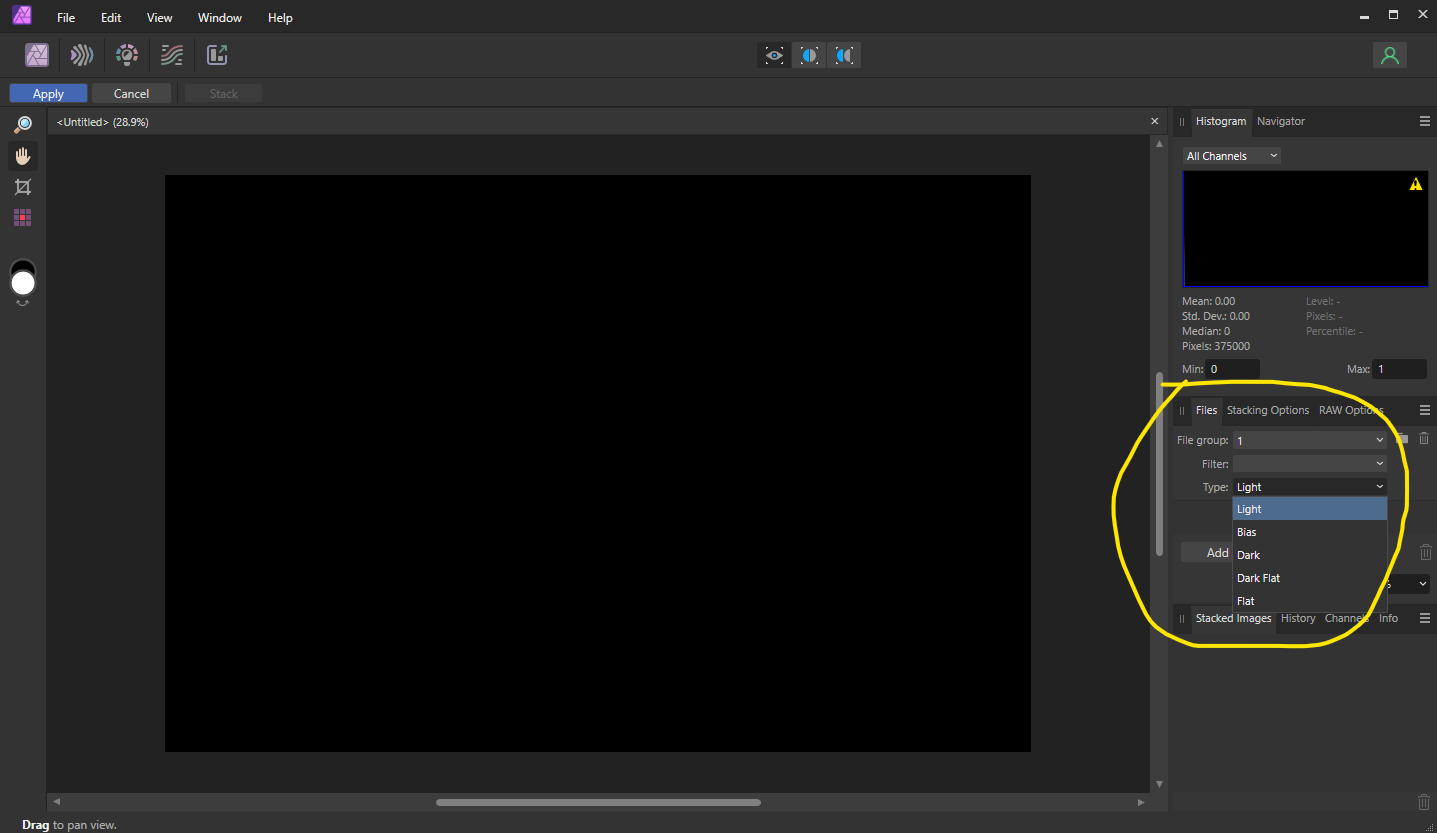
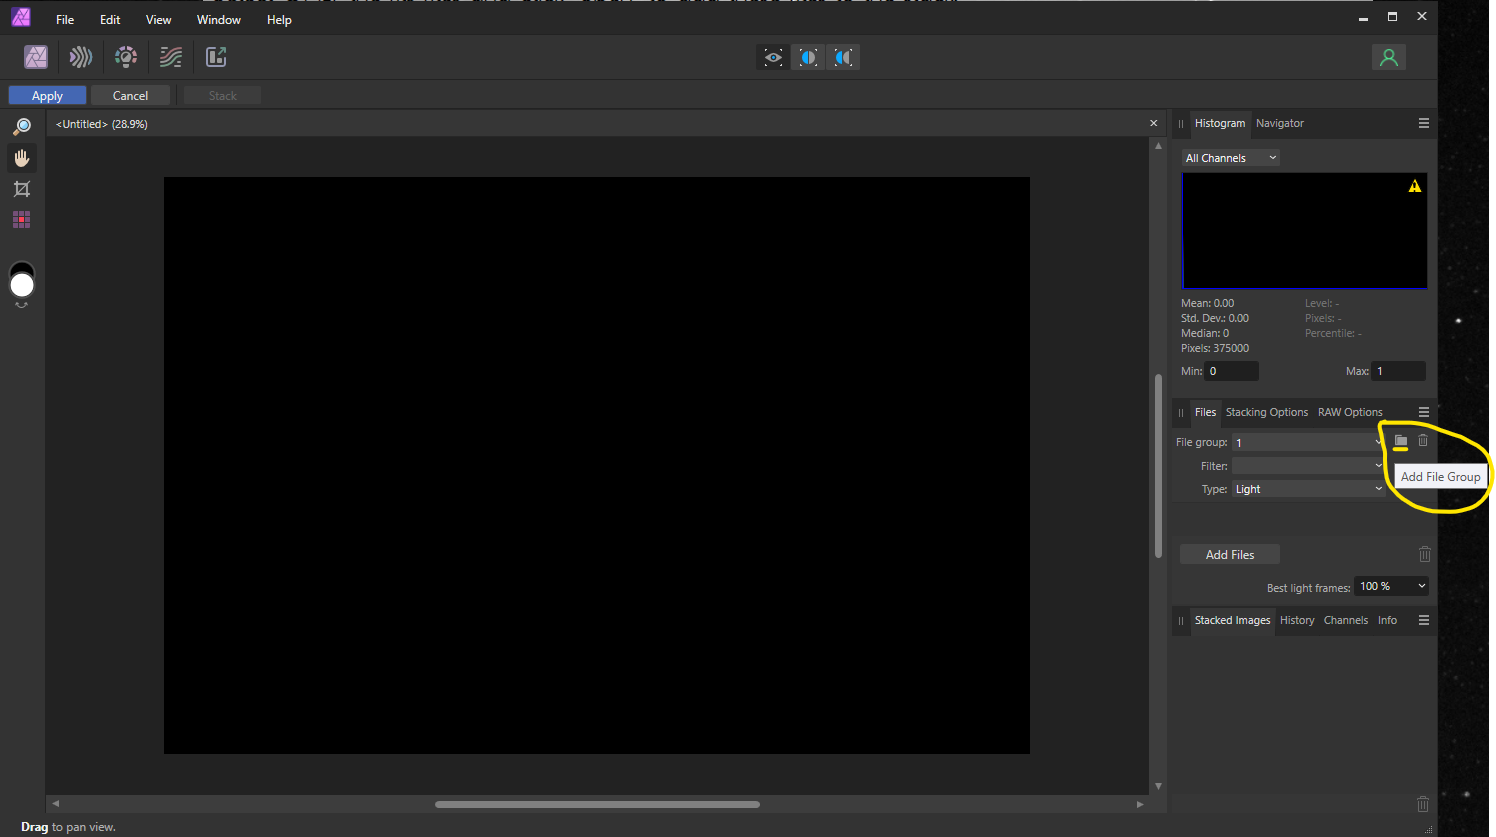
3) When the window changes, click the "Files" tab in the box on the right side of the screen. Select "light" in the "Type" dropdown, then click on "Add Files".
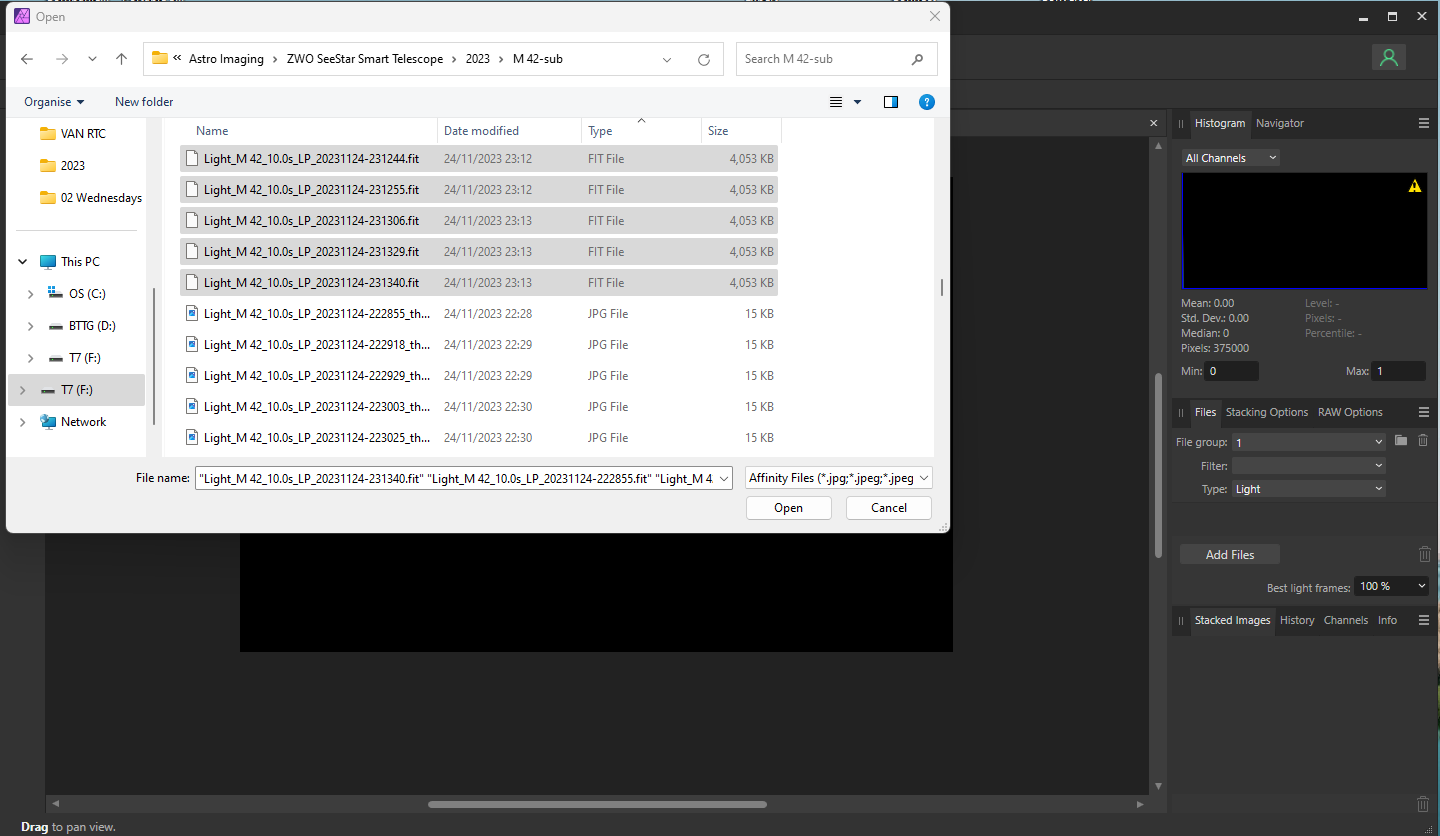
4) Select ONLY the fits files and click "open" to add these files to the stack.
4-a) (OPTIONAL) If you use a Dwarf III or standard telescope setup and you have your own dark, flat or bias callibration frames then select these from the "Type" dropdown and "Add Files" from your dark/flat/bias library in the same way as your lights.
4-b) (OPTIONAL) If you have multiple imaging sessions on the same target then you can create a file group for each session. Just click on the Folder icon and a further group will be added. You then repeat the above steps by addding the additional sessions lights / darks / flats. You can repeat this for all sessions taken on any particular target.
The reason for this is because your callibration frames are focus - temperature - and exposure time specific. One or all of these variables may change from night to night. By creating File groups the correct dark/flat/bias frames are only applied to their respective light frame group during the stack.
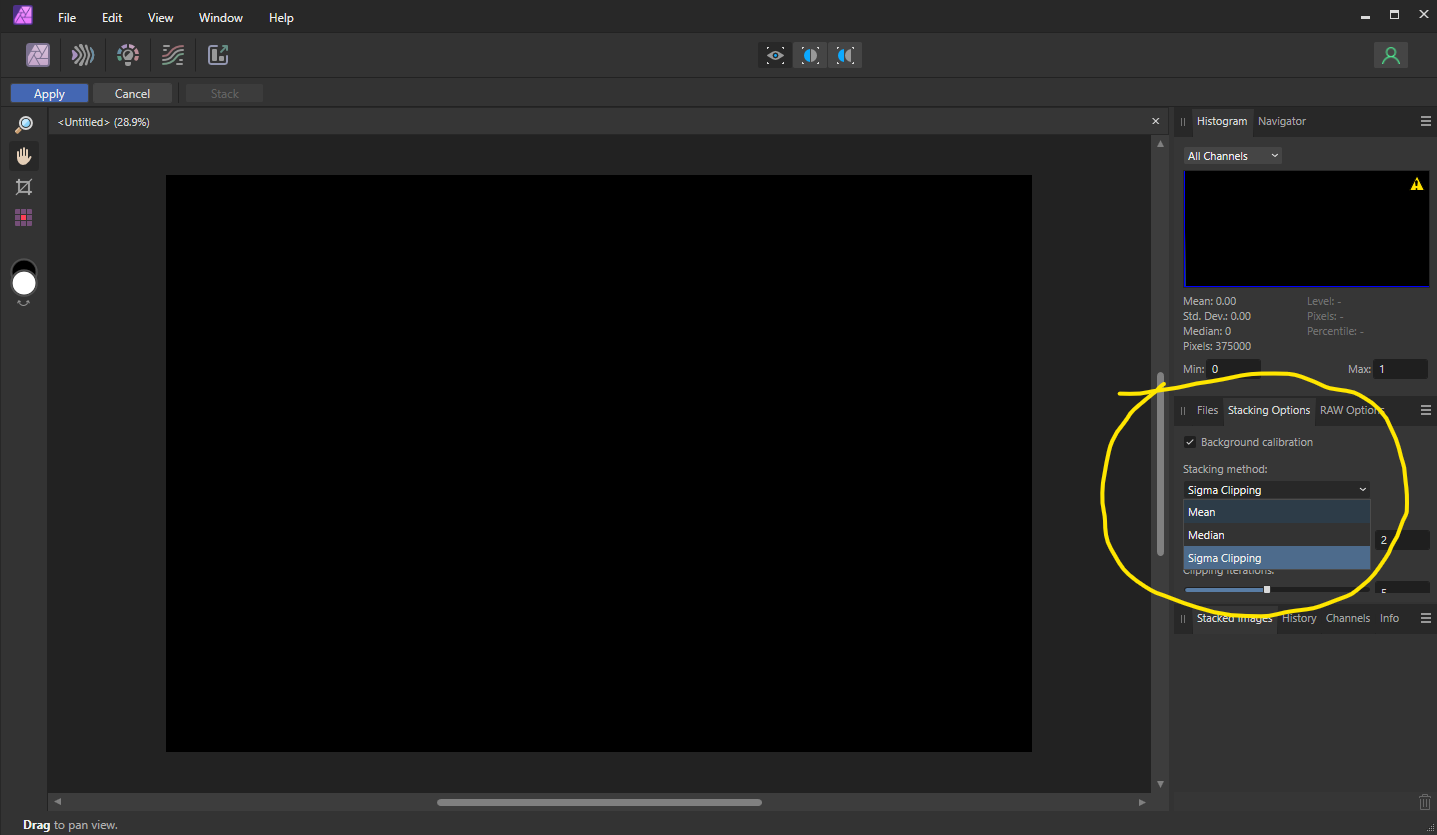
5) If you have planes or satellites in your images then select "Sigma-Clipping" in the "Stacking Options" tab. This will remove them during the stack.
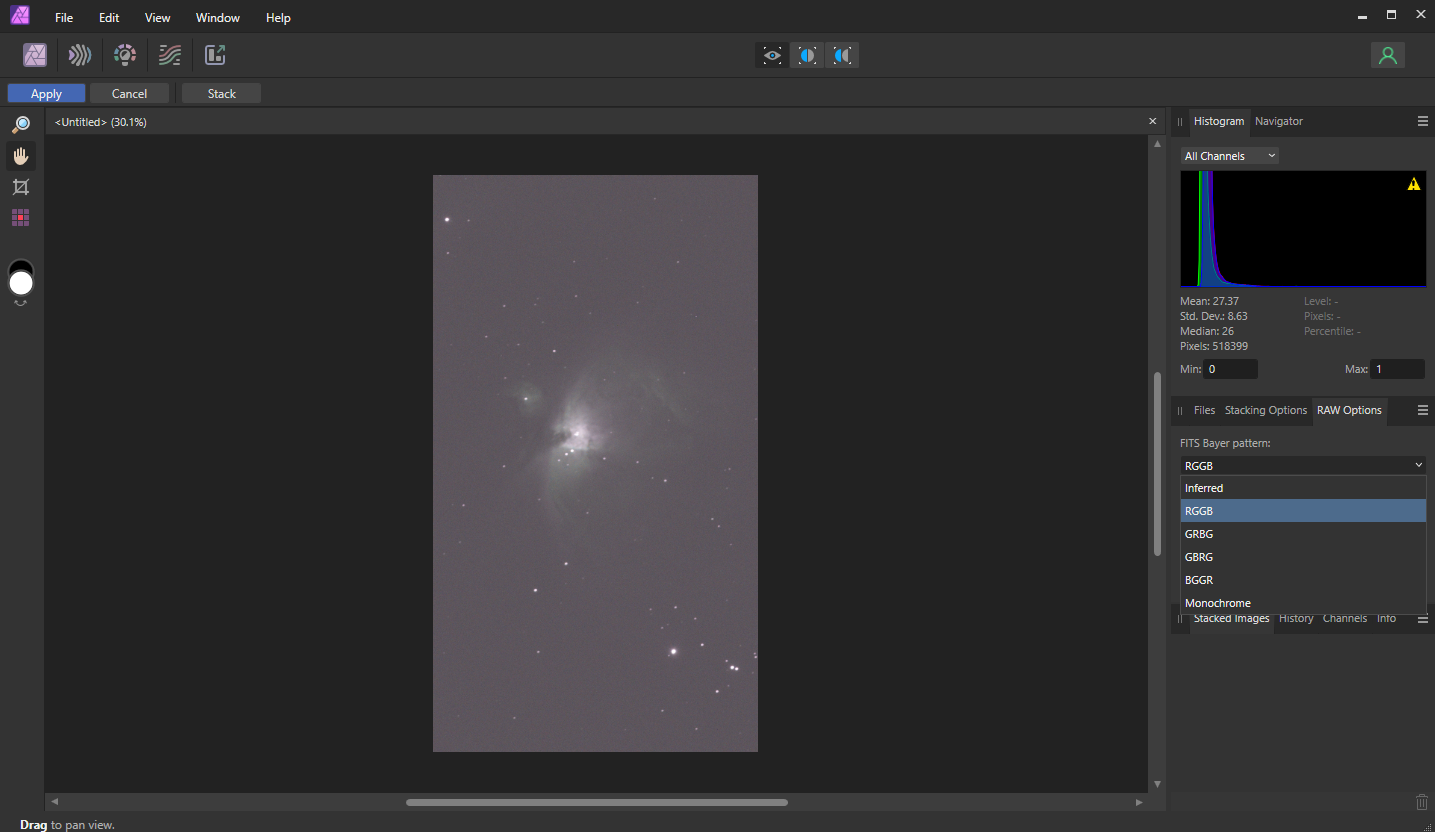
6) You can change the Bayer Pattern if required by clicking on the "RAW Options" tab and selecting the correct pattern from the dropdown menu.
7) If you have included dark callibration frames then click on the gray square with the red centre on the left hand panel under the "Apply" button. this will find any hot or cold pixels and any amp-glow that may be present and it will subtract these from the lights during the stacking process.
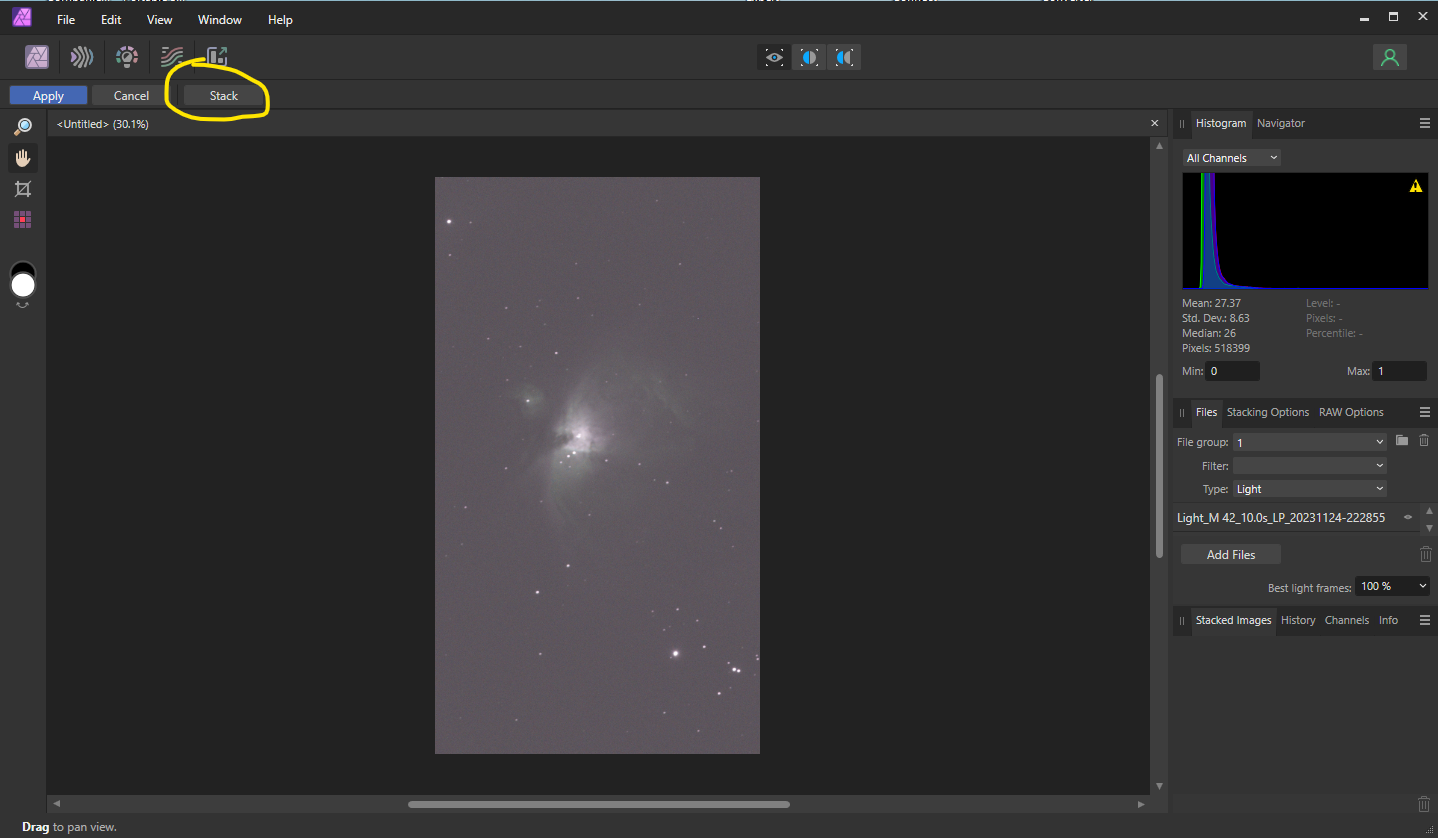
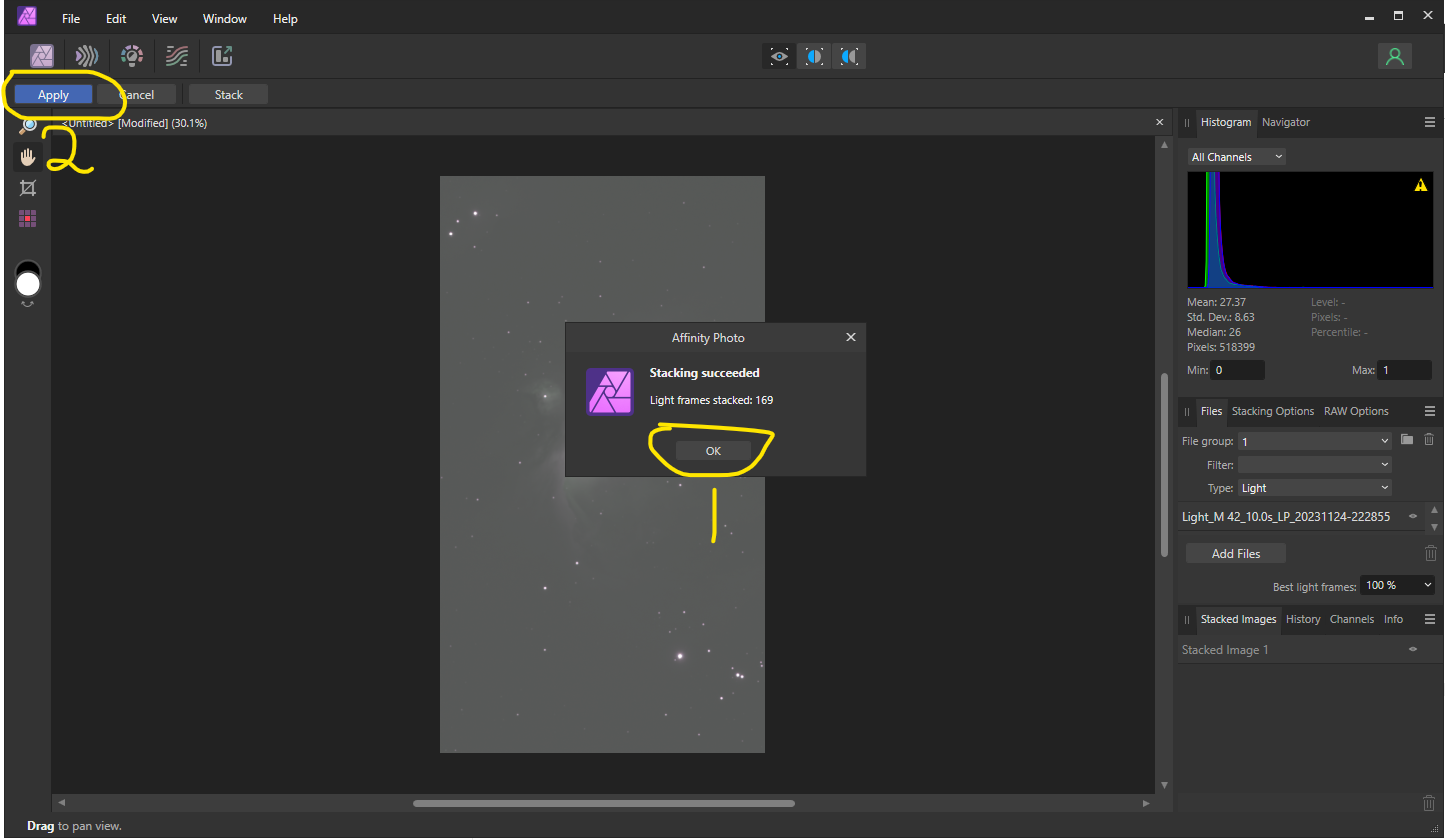
8) Click "Stack" and Affinity will start the stacking process.
9) Once stacked, click "ok" ( 1 ) then click "Apply" ( 2 ). This will then send the stacked image to the Photo Persona for further editing in Affinity.